Inserting Library Features on a Plane
You can drag library features to a plane, or anywhere in the graphics
area. If you drag a library feature to the graphics area, you are prompted
to select a plane. You can also pre-select the plane.
 To place a library feature on a plane, right-click
the plane, and select Show, to
select the plane before dragging the library feature from the Design
Library. This enables you to select the plane border and the plane
name when placing the library feature.
To place a library feature on a plane, right-click
the plane, and select Show, to
select the plane before dragging the library feature from the Design
Library. This enables you to select the plane border and the plane
name when placing the library feature.
To insert a library feature on a plane:
Open the part to which you want to add the library
feature.
Drag the library feature from the Design Library into
the graphics area.
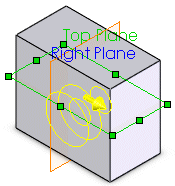
Place the pointer on plane border or plane name.
If you drag a library feature
to a reference plane, the drop point defaults to the center of the selected
reference plane.
In the PropertyManager, under Configurations:
Select a configuration
Select Link to library part
if you want changes to the parent part to propagate to this part.
Under References,
select the entity (edge, plane,and so on) in the graphics area that corresponds
to the reference highlighted in the preview window.
|
Reference in the preview window |
Corresponding entity in the graphics area |
|

|

|
|
Front edge |
|

|
|
|
Plane of axis |
|

|

|
|
Depth offset edge |
You can click the arrow  to reverse the sketch orientation when inserting the library
part.
to reverse the sketch orientation when inserting the library
part.
Under Locating
Dimensions, select a Value
if you want to change the location of the library feature.
Locating
Dimensions displays values only if
you added dimensions to the Locating Dimensions
folder in the Library Feature part.
Under Size Dimensions:
Select Override
dimension value if you want to change dimensions of the library
feature.
Size Dimensions is only available
after you place the References
and select Override dimension value
Select a Value
and edit the dimension.
Click OK
 .
.
