To display the internal parts of a model, you can create section views by adding cut planes.
You can manipulate cut planes using the standard move controls. You can use multiple cut planes to further dissect your model. There is no limit.
In SOLIDWORKS Visualize Professional, you can also animate the effect of cut planes the same way that you animate a model.
To create section views:
-
On the Models tab, click
Add
 and click New Cutting
Plane.
You can also create a cutting plane by clicking .
The cutting plane appears in the Viewport as a faint,
mostly transparent plane that automatically stretches across your entire
model.
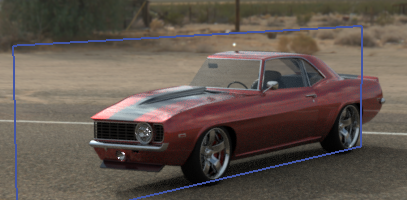
- In the model tree, select the cut plane.
The cut plane parameters are listed below the model tree.
- Type a Name for the plane.
- Use the Rotate and Transform options to modify the plane's orientation.
- To reverse the plane, click Flip.
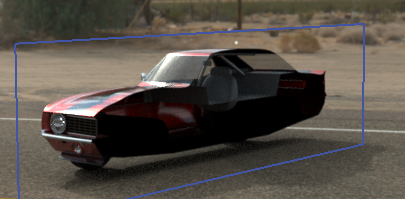
- To rotate the plane 90º, click one of the Rotate options.
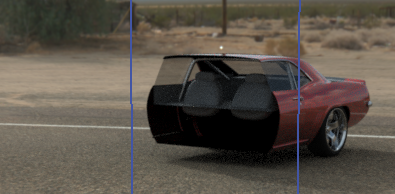
- To tip the plane, under Transform, change one or more of the Rotation XYZ values.
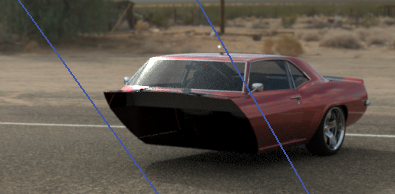
You can also use the transform manipulator to modify the position of the plane. To enable the manipulator, right-click the cut plane in the Model Set and click .
.
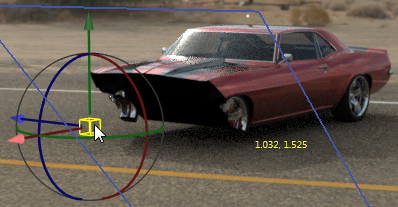
- To add an additional cutting plane, click New Cutting Plane.
- Select the second plane and use the same controls to manipulate it.
- To hide a cut plane, do one of the following:
- In the Model Set, right-click the cut plane and click Hide Cutting Plane.
- In the cut plane parameters, click Hidden.
- To remove a cut plane, in the Model Set, right-click the cut plane and click Delete.
You can also animate these cut planes as well in SOILIDWORKS Visualize Professional.
Cut planes affect all geometry in a scene. They cannot be applied to only specific parts, groups or models.