The following items are required for a component to used as a Hanger, Support or Clip in SOLIDWORKS Routing.
Names of routing sketches and dimensions are case sensitive.
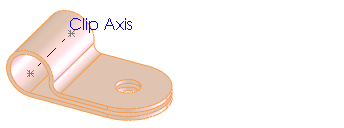
Clip Axis
An axis named Clip Axis, to align with an edge or axis in the assembly. Clip Axis runs between two route points that define the entry/exit points.
Example:
Axis of Rotation
An axis named Axis of Rotation, to facilitate rotating the clip to the desired orientation.
Example: 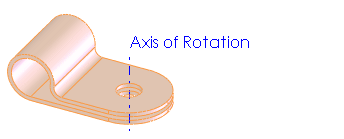
In addition, if you want the hanger, support, or clip to resize when the route diameter changes, you need:
Filter Sketch
- A sketch named Filter Sketch
- Three concentric circles with dimensions named:
- NominalDiameter (nominal size of the clip)
- InnerDiameter (diameter of the smallest bundle that the clip can accommodate)
- OuterDiameter (diameter of the largest bundle that the clip can accommodate)
Example:

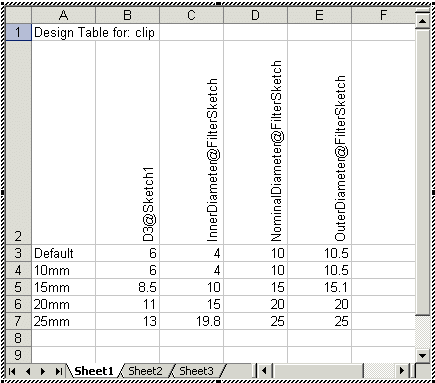
Overlapping Configurations
Insert a design table to create multiple configurations that include:
- FilterSketch dimensions. The InnerDiameter of one size must be less than the OuterDiameter of the next size down, so that the complete set of configurations covers the whole range of sizes from largest to smallest with no gaps.
- Other dimensions that vary with the size of the clip.
Example: