2D Drafting Overview
This overview lists typical 2D drafting tasks and applicable SolidWorks
solutions. The tasks and solutions show how to create the following drawing.
 Detailing and annotation tools are not used
in this overview. For a step-by-step tutorial that highlights the SolidWorks
detailing and annotation tools, see the Advanced Drawings tutorial by
clicking Help, SolidWorks
Tutorials, All SolidWorks
Tutorials.
Task Categories
Creating a front view
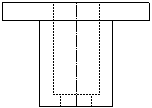
Tasks |
Solutions |
|
Create the horizontal edges of the drawing view. |
Sketch the bottom horizontal line with the Line  tool
and use the Offset
Entities tool
and use the Offset
Entities  tool to create additional edges. tool to create additional edges.

|
|
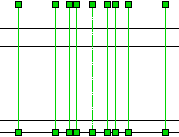
Create the vertical edges of the drawing view. |
Sketch a symmetry line with the Centerline  tool and use the Offset
Entities tool and use the Offset
Entities  tool to offset the centerline bi-directionally. tool to offset the centerline bi-directionally.
|
|
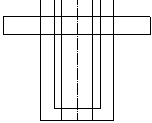
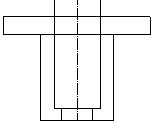
Delete excess sketch entities. |
Use the Trim
Entities  tool with the corner and power trim
options. tool with the corner and power trim
options.
|
|
|
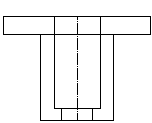
|
|
Corner |
Power trim: click-click method |
Power trim: drag method |
|

|

|

|
|
|
Change line styles to indicate hidden holes. |
Use the Line
Style  tool to change lines from solid to dashed. tool to change lines from solid to dashed.

|
 Return to task categories
Creating a top view by projecting a front view
|
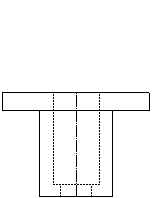
|
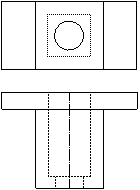
|
|
Before (front view) |
After (front and top views) |
Tasks |
Solutions |
|
Align the top view with the front view.
|
Sketch vertical infinite lines as projection lines with the Line  tool. tool.

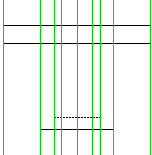
|
|
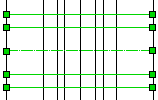
Create the horizontal edges of the drawing view. |
Sketch a horizontal symmetry line with the Centerline  tool
to define the middle of the drawing view. Offset the centerline with the
Offset
Entities tool
to define the middle of the drawing view. Offset the centerline with the
Offset
Entities  tool to create additional edges of
the drawing view. tool to create additional edges of
the drawing view.
|
|
Delete excess sketch entities. |
Use the Trim
Entities  tool with the trim away outside,
corner, and power trim options. tool with the trim away outside,
corner, and power trim options.
|

Trim away outside

|

Corner |

Power trim |
|
|
Create a hole in the center of the drawing. |
Use the Circle
 and Midpoint
Snap and Midpoint
Snap  tools to create a hole that snaps to
the center of the drawing. tools to create a hole that snaps to
the center of the drawing.

|
|
Delete excess lines. |
Hold down Ctrl to select multiple
lines and press Delete.

|
|
Change line styles to indicate hidden holes. |
Use the Line
Style  tool to change lines from solid to dashed. tool to change lines from solid to dashed.

|
 Return
to task categories
Creating a right view by projecting a front
and top view
|

|
|
|
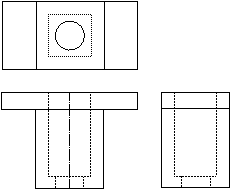
Before (front and top views) |
After (front, top, and
right views) |
Tasks |
Solutions |
|
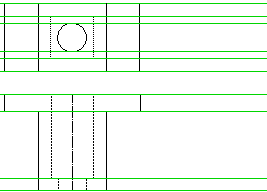
Align the right view with the front and top views. |
Use horizontal infinite lines as projection lines.
|
|
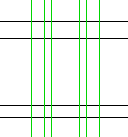
Create the vertical edges of the drawing view. |
Rotate the projection lines (from the top view) -90°
with the Rotate
Entities  tool. tool.

|
|
Delete excess sketch entities. |
Use the Trim
Entities  tool with the trim away outside,
power trim, and corner options. tool with the trim away outside,
power trim, and corner options.
|

|

|

|
|
Trim away outside |
Power trim |
Corner |
|
|
Change line styles to indicate hidden holes. |
Use the Line
Style  tool to change lines from solid to dashed.

|
 Return to task categories
Adding a slot to the top view
|

Before (top view) |

After (top view) |
Tasks |
Solutions |
|
Center the slot in the view. |
Use the Centerline  tool to create horizontal
and vertical construction lines. tool to create horizontal
and vertical construction lines.

|
|
Create the horizontal edges of the slot. |
Use the Offset
Entities  tool to offset the centerlines. tool to offset the centerlines.

|
|
Delete excess sketch entities. |
Use the Trim
Entities  tool with the power trim option. tool with the power trim option.

|
|
Create an arc to enclose the slot. |
Use the Tangent
Arc  tool. tool.

|
|
Delete excess sketch entities. |
Use the Trim
Entities  tool with the power trim option. tool with the power trim option.

|
|
Create a symmetric slot on the opposite side of the drawing view. |
Delete the vertical edge of the opposite side of the drawing view (to
create a space for the slot), then use the Mirror Entities  tool to mirror the slot. tool to mirror the slot.


|
 Return to task categories
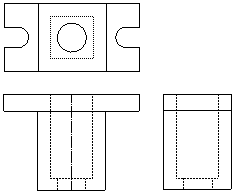
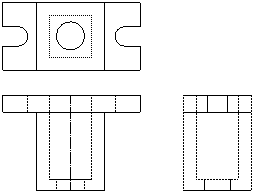
Projecting the slot to the front and right
views
|
|
|
|
Before (front, top, and right views) |
After (front, top, and right views) |
Tasks |
Solutions |
|
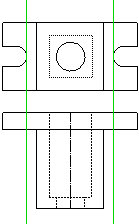
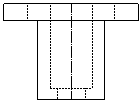
Align the slot from the top view with the front view. |
Use vertical infinite lines as projection lines.
|
|
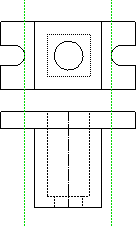
Change line styles to indicate hidden slots. |
Use the Line
Style  tool to change lines from solid to dashed. tool to change lines from solid to dashed.
|
|
Delete excess sketch entities. |
Use the Trim
Entities  tool with the trim away outside option. tool with the trim away outside option.
|
|
Align the slot from the top view with the right view.
|
Sketch horizontal infinite lines
as projection lines, then rotate the lines -90°
with the Rotate
Entities  tool. tool.

|
|
Delete excess sketch entities. |
Use the Trim
Entities  tool with the trim away outside option. tool with the trim away outside option. |
 Return to task categories
Creating a section view from the front view
|

|

|
|
Before (front view) |
After (section view) |
Tasks |
Solutions |
|
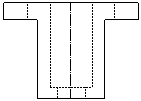
Delete the extra line in the drawing view to create a cross-section. |
Use the Trim
Entities  tool with the trim away inside option. tool with the trim away inside option.
|
|
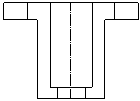
Change line styles so that hidden holes and slots are shown. |
Use the Line
Style  tool to change lines from dashed to solid. tool to change lines from dashed to solid.
|
|
Create a hatch pattern to indicate solid areas of the drawing view. |
Use the Area
HatchFill  tool to apply crosshatch sections. tool to apply crosshatch sections.


|
 Return to task categories