Revolve PropertyManager
The Revolve
PropertyManager appears when you create a new revolve
feature, or when you edit an existing revolve feature.
The PropertyManager controls
the following properties:
Revolve Parameters
Axis
of Revolution  . Select an axis around which the
feature revolves. This can be a centerline, line, or an edge, depending
on the type of revolve feature you create.
Revolve
Type. Defines the revolve direction from the sketch plane. Click
Reverse Direction  , if necessary, to reverse the revolve direction. Select one
of these options:
One-Direction. Creates the revolve in one direction from
the sketch.
Mid-Plane. Creates the revolve in the clockwise and
counter-clockwise directions from the sketch plane, which is located at
the middle of the revolve Angle
 .
.
Two-Direction. Creates the revolve in the clockwise and
counter-clockwise directions from the sketch plane. Set the Direction
1 Angle  and the Direction
2 Angle
  . The total of
the two angles cannot exceed 360 degrees.
Angle
 . Defines the angle covered by the revolve. The default
angle is 360 degrees. The angle is measured clockwise from the selected
sketch.
Thin Feature
Select Thin
Feature and set these options:
Selected Contours
Use this option when you create
a revolve using multiple contours.
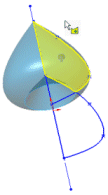
Hover
over the region in the graphics area with the pointer  .
.
The region
changes color.
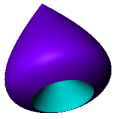
Click
in the region in the graphics area to create a preview of the revolve.
The region
of the sketch appears in the Selected
Contours  box. You can select any combination of
regions to create single or multibody parts.
Click
OK  .
.
|

|

|

|
|
Select region |
Preview contour |
Create revolve |
Feature Scope
Apply features to one or more
multibody parts. Use Feature Scope
to choose which bodies should include the feature.
 of cut extrude feature scope
 You must create the model to which you want to add the features
for multibody parts prior to adding those features.
All
bodies. Applies the feature to all bodies every time the feature
regenerates. If you add new bodies to the model that are intersected by
the feature, these new bodies are also regenerated to include the feature.
Selected
bodies. Applies the feature to the bodies you select. If you add
new bodies to the model that are intersected by the feature, you need
to use Edit Feature to edit the
extrude feature, select those bodies, and to add them to the list of selected
bodies. If you do not add the new bodies to the list of selected bodies,
they remain intact.
Auto-select.
(Available if you click Selected bodies).
When you first create a model with multibody parts, the feature automatically
processes all the relevant intersecting parts. Auto-select
is faster than All bodies because
it processes only the bodies on the initial list and does not regenerate
the entire model. If you click Selected
bodies and clear Auto-select,
you must select the bodies in the graphics area you want to include.
Solid
Bodies to Affect  (Available if you clear Auto-select). Select the bodies to affect
in the graphics area.
Related Topics
Revolve
Features
Revolved
Surface