Mold Tools - Tooling Split
After you define a parting surface,
use the Tooling Split  tool to create the core and cavity blocks for the model.
To create a tooling split, you need at least three surface bodies in the
Surface Bodies
  folder:
a core surface body, a cavity surface body, and a parting surface body.
You can create a tooling split for multiple solid bodies (for example,
one mold of multiple parts, or one mold for multiple instances of the
same part).
 This model includes
an interlock
surface.
It was created using the Ruled Surface
tool
  and it was finished using other surface
modeling
tools.
To create the tooling split:
Select
a face or plane on which to sketch an outline that separates the core
and cavity segments.

Click
Tooling Split  (Molds
Tools toolbar) or Insert, Molds, Tooling
Split.
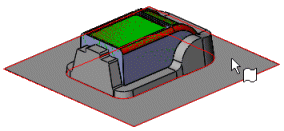
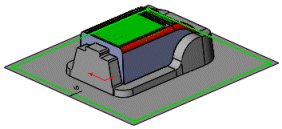
A sketch opens on the selected plane.
Sketch
a rectangle that extends beyond the model edge, but is within the parting
surface boundaries.

Close
the sketch to open the Tooling Split
PropertyManager.
Under Core  , the Core
Surface Bodies appear.
Under Cavity  , the Cavity
Surface Bodies appear.
Under Parting Surface  , the
Parting Surface Bodies appear.
 You can specify multiple disconnected core and cavity surface
bodies for one tooling split.
In
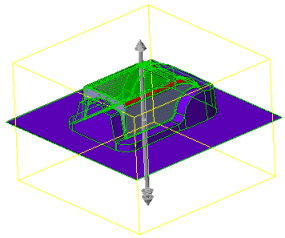
the PropertyManager, under Block Size:
Set
a value for Depth in Direction 1
 .
.
Set
a value for Depth in Direction 2
 .
.
Select Interlock surface if you want to create
a surface that helps prevent the core and cavity blocks from shifting.
An interlock surface is created along the perimeter of the parting surfaces.
Set a value for Draft Angle
 . An interlock surface typically has a draft of 5°.
 With most models, creating
an interlock surface manually provides better control than relying on
automatic creation.
Click  .
.
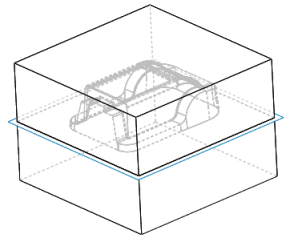
Two solid bodies appear (a core body and a cavity body).
|

|

|
|
Tooling split preview |
Tooling split applied |
 You can use Move/Copy Bodies
 (Features toolbar) to separate the tooling bodies to
facilitate viewing them.