Analysis Results PropertyManager
The final step in creating a TolAnalyst study is to set and review the results. When the Results PropertyManager is activated, the results are automatically computed with the default or saved settings.
To use the Analysis Results PropertyManager:
-
Review the results under Analysis Summary.
-
If necessary:
-
Modify the Analysis Parameter options.
-
Under Min/Max Contributors, double-click listed dimensions and tolerances to modify their tolerance values. Click OK to close the dialog box.
-
Click Recalculate to compute new results.
-
If necessary, click Export Results to export the analysis results.
-
Click  .
.
PropertyManager Options
Analysis Parameters
Use the analysis parameters to set the evaluation criteria and precision of the results.
Orientation tolerances. Includes geometric orientation tolerances (angularity, parallelism, and perpendicularity), and angular plus and minus location tolerances in the evaluation of the worst case conditions. The results are automatically recalculated each time the option is selected or cleared.

Normal to origin feature. Updates the measurement vector to be normal to the plane or axis of the Measurement PropertyManager's Measure From feature. The results are automatically recalculated each time the option is selected or cleared.

Float fasteners and pins. Uses the clearances between the holes and fasteners to increase the worst-case minimum and maximum result. Each part can move in an amount equal to the radial distance between the hole and fastener.
Tolerance precision. Sets the precision of the results given under Analysis Summary. You can set the precision before or after the results are computed. The results are not recalculated.
Recalculate. Runs the analysis. Click Recalculate after changing the tolerance values of one or more contributing tolerances under Min/Max Contributors.
 Recalculate is unavailable unless you change tolerance values of the contributing tolerances.
Analysis Summary
The analysis summary displays the results, which you can export.
Results. Lists these items:
-
The nominal value of the measurement
-
The minimum and maximum worst case conditions
-
The root sum squares (RSS) minimum and maximum worst case conditions
Export Results. Click to save the results to Excel, XML, or HTML.
Analysis Data and Display
The analysis data and display lists the contributors and manages the display in the graphics area. You can set the data and display for the minimum or maximum worst case condition.
Min/Max Contributors
The contributor list states each contributing feature and its percent contribution on the worst case minimum or maximum condition, based on the difference between the measurement nominal value and worst case result.
For example, if the nominal value is 10 mm and the worst case maximum result is 11, the feature contribution is 10% if it consumes 0.1 of the 1 mm tolerance stack.
Below each feature, the list of dimensions and tolerances that cause the contribution are displayed. When you select an item in the list, the dimension or tolerance appears in the graphics area. Double-click an item in the list to open the Dimension Tolerance or Change Geometric Tolerance dialog box where you can modify the tolerance values. With these two dialogs, you are editing the part. These are not temporary overrides to values. After modifying tolerance values, click Recalculate to compute new results.
Graphics Area Display
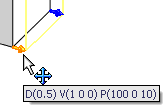
The graphics area display for the minimum and maximum worst case result includes:
|

|
|
|
|
|
|
Red for Min  and blue for Max and blue for Max 
|
|
|
|
|
|

|
|
|
|
|
|

|
|

|
|
|
|
|
|

|
Warnings
When TolAnalyst evaluates the study, warning messages appear if there are potential problems with the setup and evaluation. When TolAnalyst identifies the following condition, consider the results with caution.
Incomplete Tolerance Chains
This warning appears when a complete tolerance chain does not exist between the two measurement features.
|
When performing a study on the distance between the two holes in this assembly, a warning appears about an incomplete tolerance chain.
|

|
|
|
|
|
The warning appears because in the parts, there are no dimensions or tolerances controlling the location of the hole, which is under constrained.
|

|