Broken-out Section
A broken-out section view cuts away a portion of an assembly in a drawing view to expose the inside. Cross hatching is automatically generated on the sectioned faces of all components.
A broken-out section is part of an existing drawing view, not a separate view. A closed profile, usually a spline, defines the broken-out section. Material is removed to a specified depth to expose inner details. Specify the depth by setting a number or by selecting geometry in a drawing view.
You cannot create a broken-out section on a detail, section, or alternate position view. If you create a broken-out section of an exploded view, you cannot collapse the exploded view.
|
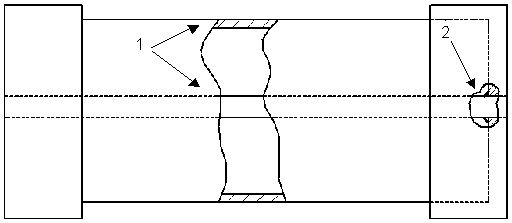
This example shows (1) wall thickness and shaft and (2) how the shaft is welded to the cap:
|
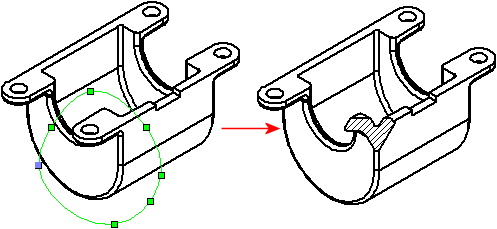
Broken-out section of a pictorial (isometric, trimetric, dimetric) view. The depth is normal to the sheet:
|
|

|

|
To create a broken-out section:
-
Click Broken-out Section  on the Drawing toolbar, or click Insert, Drawing View, Broken-out Section.
The pointer changes to  .
.
 If you want a profile other than a spline, create and select a closed profile before clicking the Broken-out Section tool.
-
Sketch a profile.
-
Set options in the Section View dialog box. If you do not want to exclude components or fasteners from the broken-out section view, click OK.
-
Set options in the Broken-out Section PropertyManager.
 Use 3D drawing view mode to select an obscured edge for the depth of a broken-out section view.
-
Click OK  .
.
To delete or edit a broken-out section:
-
Right-click the broken-out section in the FeatureManager design tree and select one of the following.
-
Delete.
-
Edit Definition. Set options in the
Broken-out Section PropertyManager
, then click OK  .
.
-
Edit Sketch. Select the sketch entity and edit it, then close the sketch.