Draft Analysis PropertyManager (CPU-based)
 This topic applies only to CPU-based draft analysis. The software uses CPU-based processing only if your graphics card is not able to perform the necessary GPU-based processing required for the newer GPU-based draft analysis. See Graphics Card Considerations in Mold Analysis Tools.
Using the settings in draft analysis, you can verify draft angles on model faces or you can examine angle changes within a face.
To apply a draft analysis to verify draft angles:
-
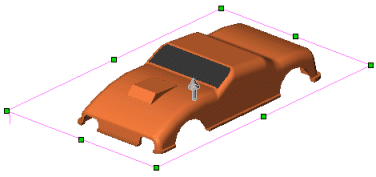
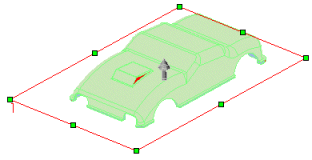
Open the model, then click Draft Analysis  on the Mold Tools toolbar, or click View, Display, Draft Analysis.
-
Under Analysis Parameters, do the following:
-
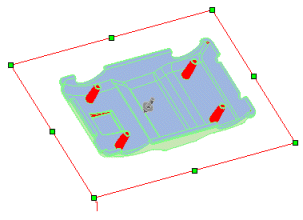
Select a planar face, a linear edge or an axis to indicate the Direction of Pull.
-
Note the draw direction. To change the draw direction, click Reverse Direction  . You can also use the handle in the graphics area to reverse direction.
-
Enter a Draft Angle  .
.
-
Click Adjustment triad and drag the triad to adjust the direction of pull.
-
Click Face classification to conduct a face-based draft analysis.
-
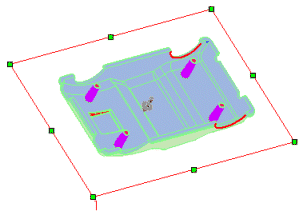
If necessary, click the Find steep faces check box. Use steep faces when the model includes curved faces. Selecting Find steep faces displays faces that have a portion of the face with less angle than the specified draft angle to the direction of pull.
When you select Find steep faces, two additional categories, are displayed:
-
-
Positive steep faces
-
Negative steep faces
These categories function in the same manner as other face categories (positive draft, negative draft, and so on), but only apply to steep faces..
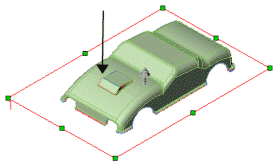
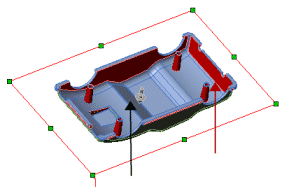
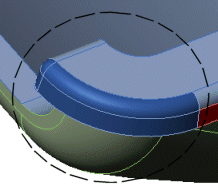
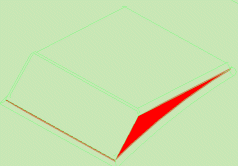
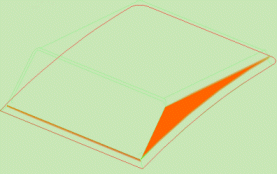
The regions of the model display the colors appropriate to their draft angle.
-
Examine the results. Note that the colors may not exactly match with the images below, and will depend on your computer settings.
|
|
|
|
Positive draft 
|
Negative draft
Requires draft 
|
If the model includes curved faces and you checked the Find steep faces check box, examine steep faces as well.
When analyzing the draft for surfaces, an additional Face classification criterion is added: Surface faces with draft. Since a surface includes an inside and an outside face, surface faces are not added to the numerical part of the classification (Positive draft and Negative draft). Surface faces with draft lists all positive and negative surfaces that include draft.
|
|
|
|
Draft Required
Positive steep faces
|
Negative steep faces
|
Straddle faces. Displays faces that include a combination of positive and negative draft.
To examine draft angles within a face in more detail, use a contour map. Perform the analysis without using Face classification. See "To apply a contour map of draft angles" below.
-
You can change the default colors, and toggle between Show  or Hide
  .
.
You can change colors or toggle the display before or after you complete the steps under Analysis Parameters.
-
Click  to exit the draft analysis.
To apply a contour map of draft angles:
-
Open the model, then click Draft Analysis (Mold Tools toolbar).
-
Under Analysis Parameters, do the following:
-
Select a plane, a planar face, a linear edge or an axis from the graphics area to indicate the Direction of Pull.
-
Note the draw direction. To change the draw direction, click Reverse Direction .
-
Enter a Draft Angle .
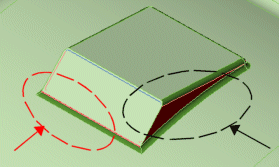
The regions of the model display a color according to their draft angle.
|
|
|
Move the pointer over the different areas on the model to display the draft angle at that location.
|
|
|
-
Under Color Settings, you can toggle between two display modes, and change the colors.
-
Clear the Gradual transition check box to display a uniform color gradient. This is the default display.
-
Check the Gradual transition check box to display color variations that reflect the transitions in the draft angles on the model. This displays the range of angles (positive draft through negative draft), based on the Draft Angle
you specified. Gradual transition is especially useful with complex models with numerous variations in the draft angle.
You can see the individual faces of the model during a color contour calculation by specifying Shaded with Edges  on the View toolbar.
|
|
|
|
|
|
|
|
|
|
Gradual transition check box cleared
|
Gradual transition check box checked.
|
-
To change the color display, click Edit Color, select a color from the Color dialog box, and click OK.
If you selected Gradual transition, you can change only the colors for Positive draft and Negative draft.
-
If necessary, under Draft Angle, enter a new value to view angular changes in smaller steps.
-
If you changed the values under Draft Angle, press Enter to update the results.
-
Click .