You can cut features using Cut  (2D to 3D toolbar) with partial sketches.
Extruded Cut on the Features toolbar accepts only complete sketches.
To cut a feature:
- Edit a sketch.
- Select the sketch entities required for the feature.
It is not necessary to select a complete sketch.
- Hold Ctrl and select a face to be the starting point for the cut.
- Click Cut (2D to 3D toolbar), or click , and click in the graphics area to establish the direction of the cut.
The Cut-Extrude PropertyManager appears.
- Edit the properties in the Base Extrude PropertyManager.
For 2D to 3D conversion, you can specify the depth of a blind cut by selecting a sketch entity. Click
Depth 
and select an entity in a sketch.
- Click OK
 .
.
| Example of Cutting in 2D to 3D Conversion
|
|---|
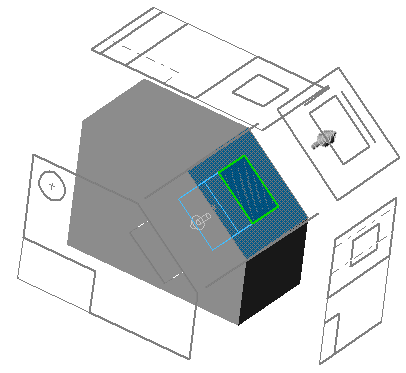
Select the sketch entities shown in the auxiliary view to define the cut.
Hold Ctrl and select the face shown on the base feature as the starting point.
|
 |
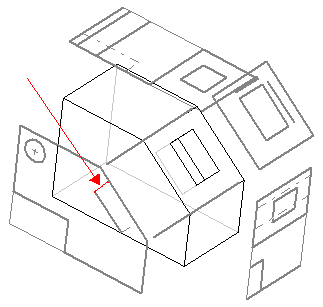
| Click Cut (2D to 3D toolbar) and click in the graphics area to establish the direction of the cut.
|
 |
In the Cut-Extrude PropertyManager, click Depth and select the line shown in the front view to specify the depth of the cut.
Click OK
.
Click Hidden Lines Visible  (View toolbar) to see the cut. (View toolbar) to see the cut.
|
 |