Expand IntroductionIntroduction
Expand AdministrationAdministration
Expand User InterfaceUser Interface
Collapse SOLIDWORKS FundamentalsSOLIDWORKS Fundamentals
Basic Concepts
Expand Help, Search, and Web ResourcesHelp, Search, and Web Resources
Expand Document BasicsDocument Basics
Collapse Overview of SOLIDWORKS OptionsOverview of SOLIDWORKS Options
Accessing the Options Dialog Box
Expand System OptionsSystem Options
Collapse Document PropertiesDocument Properties
Document Properties - Drafting Standard
Expand Document Properties - AnnotationsDocument Properties - Annotations
Document Properties - Borders
Expand Document Properties - DimensionsDocument Properties - Dimensions
Document Properties - Centerlines/Center Marks
DimXpert Options - Drawings
Document Properties - Virtual Sharp Display
Expand Document Properties - TablesDocument Properties - Tables
Expand Document Properties - ViewsDocument Properties - Views
Document Properties - Detailing
Document Properties - Drawing Sheets
Document Properties - Grid/Snap
Document Properties - Units
Document Properties - Line Font
Document Properties - Line Thickness
Document Properties - Model Display
Document Properties - Material Properties
Document Properties - Image Quality
Document Properties - Sheet Metal
Document Properties - Weldments
Document Properties - Plane Display
Document Properties - Configurations
Expand Document Properties - DimXpertDocument Properties - DimXpert
Expand DisplayDisplay
Expand SelectionSelection
Expand File PropertiesFile Properties
Expand Measure ToolMeasure Tool
Expand SensorsSensors
Expand EquationsEquations
Mirror and Opposite-Hand Disambiguation
Industry-Specific Design Tools
Xperts Overview
Add-Ins
Expand Object Linking and EmbeddingObject Linking and Embedding
Expand Recording and Playing MacrosRecording and Playing Macros
SOLIDWORKS API
Expand  SOLIDWORKS Task Scheduler SOLIDWORKS Task Scheduler
Expand TasksTasks
Expand OptionsOptions
About SOLIDWORKS
Expand Moving from 2D to 3DMoving from 2D to 3D
Expand AssembliesAssemblies
Expand CircuitWorksCircuitWorks
Expand ConfigurationsConfigurations
Expand SOLIDWORKS CostingSOLIDWORKS Costing
Expand Design CheckerDesign Checker
Expand Design Studies in SOLIDWORKSDesign Studies in SOLIDWORKS
Expand Detailing and DrawingsDetailing and Drawings
Expand DFMXpressDFMXpress
Expand DriveWorksXpressDriveWorksXpress
Expand FloXpressFloXpress
Expand SLDXML Data ExchangeSLDXML Data Exchange
Expand Import and ExportImport and Export
Expand Model DisplayModel Display
Expand Mold DesignMold Design
Expand Motion StudiesMotion Studies
Expand Parts and FeaturesParts and Features
Expand RoutingRouting
Expand Sheet MetalSheet Metal
Expand SimulationSimulation
Expand SimulationXpressSimulationXpress
Expand SketchingSketching
Expand SOLIDWORKS MBDSOLIDWORKS MBD
Expand SOLIDWORKS UtilitiesSOLIDWORKS Utilities
Expand SOLIDWORKS SustainabilitySOLIDWORKS Sustainability
Expand TolerancingTolerancing
Expand TolAnalystTolAnalyst
Expand ToolboxToolbox
Expand WeldmentsWeldments
Expand Workgroup PDMWorkgroup PDM
Expand TroubleshootingTroubleshooting
Glossary
Hide Table of Contents

Document Properties - Dimensions

You can specify document-level drafting settings for all dimensions. Available for all document types.

Dimensions that are inserted using Insert Model Items, DimXpert, and other automated methods are placed on predefined locations that radiate out from the drawing view. You set the predefined locations in this dialog box.

To display this dialog box:

In a drawing, click Options (Standard toolbar), select Document Properties, and then select Dimensions.

Overall drafting standard

Overall drafting standard Inherited from the selected drafting standard page settings.

Text

Font

Click to modify the font.

Each time you change the dimension font, the document-level font for each dimension type is updated accordingly.

Dual dimensions

Dual dimensions display Select to display dimensions in dual units.
Show units for dual display Select to display units for the second set of dimensions.
Dimension value position Top
Bottom
Right
Left

Primary precision

Unit Precision Select the number of digits included after the decimal point for the value.
PM_Tol_Precision_DualDim.gif Tolerance Precision Select the number of digits included after the decimal point for the tolerance.
  Link precisions with model For imported dimensions, sets changes in unit or tolerance precision to be parametric with the model.

Dual precision

Unit Precision Select the number of digits after the decimal point from the list for the value in the secondary units.
PM_Tol_Precision_DualDim.gif Tolerance Precision Select the number of digits after the decimal point for the tolerance values for the secondary units.
  Link precisions with model For imported dimensions, sets changes in unit or tolerance precision for the secondary units to be parametric with the model.

Fractional display

Style, the style for the display of fractional dimensions


Stack size, the size of the stacked fractions expressed as a percentage of the whole portion of the dimension


Show double prime mark ("), the display of double prime marks in fractional dimensions


Fractional dimensions are available only for lengths in IPS (inch-pound-second) units.

Stacked Fractional Dimension Size by Percentage

 
100%
50%

Bent leaders

Leader length Enter the length of the unbent portion of the leader.
Extend to text Leader shoulders extend to meet the end of the line of dimension text.

Arrows

Size

Specify the three arrow size fields.

Select Scale with dimension height to re-scale the arrow size according to the height of the dimension extension line.

Style
Select a style from the list, and click a dimension style type button:
  • arrow_out.png Button
  • arrow_smart.png Button

Offset distances

Offset distances

Sets the dimension distances from the model and from each successive location (as indicated by the red dimensions below). Offset distances must conform to the values assigned in Offset distances. The default offset distances are .40 inches (10.16 mm) from the model edge and .25 (6.35 mm) inches between dimensions.

Gaps
For baseline dimensions, specify the offset distances:
  • Between the model and the first dimension extension line
  • Between dimension extension lines
These values also control the spacing between dimensions that are offset from one another and from the model edge when using rapid dimensioning.
Annotation view layout

Select to use offset distances specifications from an annotation view. (See Annotation View PropertyManager.) Clear to enter the gaps.

Break dimension extension/leader lines

Gap

Specify the gap in broken extension and leader lines.

Break only around dimension arrows

Select to display breaks only when the lines and arrows intersect.

To break the dimension lines, select the dimension and click Break Lines in the PropertyManager. When you break dimension lines, they break around nearby lines. If you move a dimension significantly, it might not break around nearby lines. To update the display, clear Break Lines for the selected dimension and click Break Lines again.

Extension lines

Gap

Specify the distance between the model and the dimension extension lines. This value also controls the gap between extension lines and center marks.

Beyond dimension line

Specify the length that the extension line extends beyond the dimension line.


Options

Leading zeros
Standard Leading zeros appear according to the overall drafting standard.
Show Zeros before decimal points are shown.
Remove Leading zeros do not appear.
Trailing Zeros
Smart Trailing zeros are trimmed for whole metric values, conforming to ANSI and ISO standards.
Standard Trailing zeros appear according to the ASME Y14.5M-1994 standard.
Show Trailing zeros are displayed according to the decimal places you specify for Units.
Remove Trailing zeros do not appear.
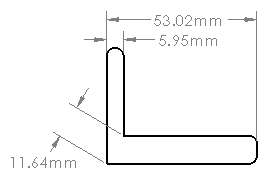
Show units of dimensions

Select to show dimension units in drawings.
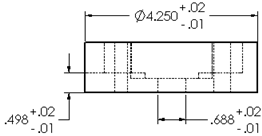
Add parentheses by default

Select to display dimensions within parentheses.
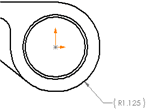
To set the color, click Tools > Options > System Options > Colors. In Color scheme settings, select Dimensions, Non Imported (Driven).
Center between extension lines

Select to center dimensions between extension lines. This option also selects Center Dimension dim_center.png Button in PropertyManagers that contain the Center Dimension option.

When you drag dimension text between the extension lines, the dimension text snaps between the center of the extension lines.
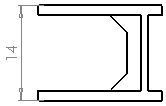
Include prefix inside basic tolerance box

Select to include a text prefix inside tolerance boxes when you specify a prefix.
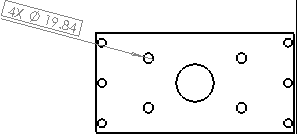
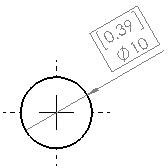
Display dual basic dimension in one box

Select to include dual dimensions in one basic tolerance box.
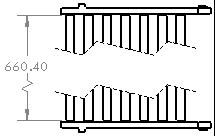
Show dimensions as broken in broken views

Select to break dimension lines for broken views.
Apply updated rules
Select to update vertical alignment of bent leaders so that shoulders center on appropriate line of dimension text in geometric dimensioning and tolerancing feature control frame. Existing dimensions display unchanged until this option is applied. Once applied, the option is no longer available.
prj-18210-previous-style.gif
Previous rules
prj-18210-updated-style.gif
Updated rules

Diameter dimensions created in releases prior to SOLIDWORKS 2015 did not generate extension lines automatically when you placed a diameter dimension on geometry that extended beyond the crop or detail view. Select Apply updated rules to force legacy dimensions to display extension lines on diameter dimensions.

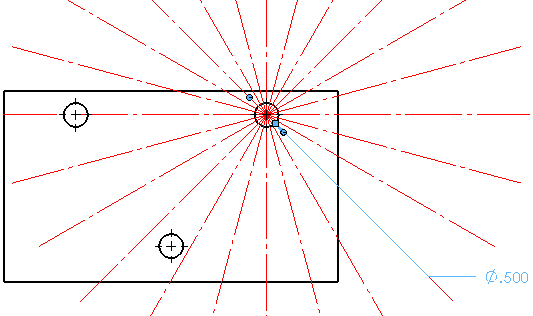
Radial/Diameter leader snap angle

Modify the snap angle intervals used when you drag diameter, radial, or chamfer dimensions along radial locations.
Tolerance

Click to set the tolerance.


Provide feedback on this topic

SOLIDWORKS welcomes your feedback concerning the presentation, accuracy, and thoroughness of the documentation. Use the form below to send your comments and suggestions about this topic directly to our documentation team. The documentation team cannot answer technical support questions. Click here for information about technical support.

* Required

 
*Email:  
Subject:   Feedback on Help Topics
Page:   Document Properties - Dimensions
*Comment:  
*   I acknowledge I have read and I hereby accept the privacy policy under which my Personal Data will be used by Dassault Systèmes

Print Topic

Select the scope of content to print:


x

We have detected you are using a browser version older than Internet Explorer 7. For optimized display, we suggest upgrading your browser to Internet Explorer 7 or newer.

 Never show this message again
x

Web Help Content Version: SOLIDWORKS 2016 SP05

To disable Web help from within SOLIDWORKS and use local help instead, click Help > Use SOLIDWORKS Web Help.

To report problems encountered with the Web help interface and search, contact your local support representative. To provide feedback on individual help topics, use the “Feedback on this topic” link on the individual topic page.