You create exploded views in multibody parts by selecting and dragging solid bodies in the graphics area, creating one or more explode steps.
To create an exploded view:
-
Click Exploded View
 (Assembly toolbar) or .
- Select one or more solid bodies to include in the first explode step.
In the PropertyManager, the bodies appear in
Bodies of the exploded step 
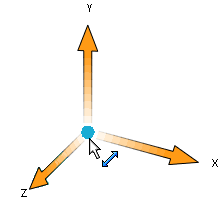
. A triad appears in the graphics area.

To move or align the triad:
-
Drag the center ball to drag the triad freely.
-
Alt + drag the center ball or an arm and drop it on an edge or face to align the triad with the edge or face.
- Right-click the center ball and select Align to or Align with Component Origin.
- Drag a triad arm to explode the solid bodies.
The explode step appears under Explode Steps.
- Under Settings, click Done.
The PropertyManager clears and is ready for the next explode step.
-
Create more explode steps as needed, then click
 .
.
The exploded view feature,
ExplView 
, appears in the ConfigurationManager under the configuration in which the exploded view was created. Each configuration can have multiple exploded views.
You can copy an exploded view from the active configuration to another configuration by dragging
ExplView 
in the ConfigurationManager. You can access the copy of the exploded view when you activate the second configuration.