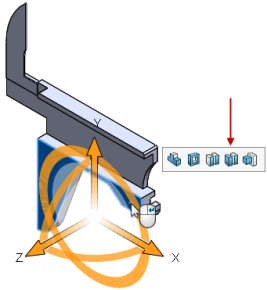
Creating Translated Move Face Features Open a model. Right-click any CommandManager tab and click Direct Editing to activate this tab. Do one of the following: Right-click the face and click Move Face. On the Direct Editing CommandManager tab, click Move Face and select the face. The triad appears. A graphical pop-up toolbar appears to help you select connected faces. In the PropertyManager, under Move Face, select Translate. Click the pop-up toolbar image shown to select all co-planar faces. If the pop-up toolbar does not appear, clear the selected face and reselect it. Select an Edge Condition in the PropertyManager and set the parameters. Drag the triad arm shown away from the face.A ruler appears to help you drag a discrete distance. The selected faces are translated by that distance. Click . Parent topicMove Face PropertyManager Related tasks Creating Rotated Move Face Features Using Select Connected Faces