Using Quick Input Methods
Quick Input provides a command entry interface near the pointer. This lets you keep focus on the geometry.
You can hide the Command Window when you are familiar with Quick Input methods. Quick Input does not replace Command Window functionality completely. For example, the Command Window shows error messages, requested information, and file lists.
The main elements of Quick Input are the tooltips near the pointer which display prompts and act as input boxes for coordinates, distances, lengths, angles, and more. When you move the pointer, the tooltips track coordinate positions, lengths, angles, and so on. Construction lines for distances and angles are included in Quick Input assistance.
Quick Input Methods
Quick Input methods include:
- Quick Prompts:
- When no command is active, an input box for command entry appears as you type.

- When invoked, the command prompts you with a tooltip.
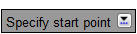
- Where appropriate, the prompt tooltip lets you select options from a list
 .
.

Press the Down key  to display and select options.
- Press the Up key
 to display and select:
- Recently used commands when no command is active
- Recently specified points when running a command
- Pointer Input:
- Input boxes let you specify coordinates of points. Examples are: the start point of a line, the center point of a circle, a vertex point of a PolyLine, a control point of a Spline, a tangent point, or a Block insertion point. Press Tab to cycle through input boxes.

- Tooltips display the location of the pointer as coordinates.

- Dimension Input:
- Tooltips display a distance and an angle as you move the pointer and serve as input boxes for the corresponding values when you are prompted for a second point or a distance. Press Tab to cycle through input boxes.

Dimenson Input is available for Lines, PolyLines, Arcs, Circles, Ellipses, and offsets.
You can turn on or off individual methods and control the behavior of these methods and adjust the tooltip appearance with the Options command (see Quick Input Preferences). When you turn on Pointer Input and dimension input at the same time, Dimension Input supersedes Pointer Input.
To turn on and off Quick Input:
Do one of the following:
- Click QInput on the status bar.
- Right-click QInput on the status bar and click On or Off.
- Press the F12 key.
Quick Input and EntityGrips
Quick Input helps when you modify entities using EntityGrips (EGrips).
To use Quick Input when you modify entities using EGrips:
- Make sure EGrips and Quick Input are on.
- Select the drawing entities to modify and click an EGrip.
The specified EGrip changes color. The Stretch point quick prompt appears with input boxes for Dimension Input.
- Type values in the input boxes (press Tab to cycle through input boxes).
The meaning of the input boxes depends on the entity and the settings for Dimension Input (see Quick Input Preferences).
Dimension lines visualize the changes that result from Quick Input.
- Press Enter to accept the values in the input boxes.
- Press Esc to clear EGrips from the selected entities.
Quick Input Preferences
To adjust Quick Input methods:
- Do one of the following:
- On the status bar, right-click QInput and click Settings.
- Click Tools > Options (or type Options), click User Preferences
 , then expand DraftingOptions > Quick Input.
- Click Tools > Options (or type Options), click User Prefrences , then expand DraftingOptions > Quick Input.
- Click Application menu > Preferences (or type Options), click User Prefrences , then expand DraftingOptions > Quick Input.
- Expand Pointer Input and specify options:
- Enable Pointer Input. Turns Pointer Input on and off. When turned off, the other settings of this section are not applied.
- Under Format, specify whether to apply:
- Polar Format or Cartesian Format (default) when specifying coordinates for a second point or for subsequent points.
- Relative Coordinates (default) or Absolute Coordinates when specifying a second point or subsequent points.
- Under Display, for Coordinate tooltip display, select one of the following:
- When point input is required in command. Displays input boxes whenever a command prompts for a point (default).
- Always display tooltip. Displays X and Y coordinate tooltips when no command is active and tracks coordinate position. Displays input boxes whenever a command prompts for a point.
- Expand Dimension Input and specify options:
- Enable Dimension Input. Turns Dimension Input on and off. When turned off, the other settings of this section have no meaning.
- Dynamic dimension display - geometry creation / stretching. Select one of the following:
- Display one dimension input box. Displays only the distance dimension input box when you stretch an entity using an EntityGrip.
- Display two dimension input boxes. Displays the distance and angle dimension input boxes when you stretch an entity using an EntityGrip (default).
- Display only checked input boxes. Displays input boxes as controlled by the following options when you stretch an entity using an EnityGrip:
- Resulting dimension. Displays a length dimension input box as you move an EntityGrip.
- Absolute angle. Displays an angle dimension input box as you move an EntityGrip.
- Length change. Displays the length change as you move an EntityGrip.
- Angle change. Displays the angle change as you move an EntityGrip.
- Expand Quick Prompts and specify whether to Display command prompt and command input with crosshairs.
- Expand Quick Tooltip Appearance and specify options:
 Note: You can change the colors of background, borders, and text of Quick Input tooltips and input boxes in the Options dialog box under System Options > Display > Element Colors.