You can change the diameter and specifications of a pipe or tube route. The Change Route PropertyManager appears so you can select new configurations for all the elements (flanges, elbows, pipe, and so on) in the route.
To change the diameter of a route:
-
While editing a route sketch, select a line segment in the route.
- Click Change Route Diameter
 (Routing Tools toolbar) or .
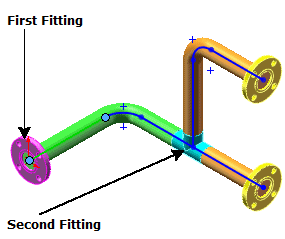
The Change Route PropertyManager appears. The route segment is highlighted in the graphics area. The fitting closest to the location you selected on the route segment appears under First Fitting, and is pink; Second Fitting is blue.
- Set options and make selections in the PropertyManager.
- Click
 as needed to make selections for remaining elements of the route.
- Click
 .
.
With the Change Route Diameter tool, you can change the route of the diameter for the routes which are created on the fly.