You can create connection
points (Cpoints) in two ways, using the SOLIDWORKS Routing Library Manager, or using the
tools in the SOLIDWORKS Electrical menu.
SOLIDWORKS Routing Library Manager
To create connection points using the SOLIDWORKS
Routing Library Manager:
- SOLIDWORKS Electrical 3D menu: Electrical Components Wizard.
- In the menu, click
 .
.
- In the menu, click .
The Electrical Component
Wizard lets you add connection points to connect cables, cable
cores, and wires on the component.
To add connection points:
- In the wizard,
under Routing Functionality Points:
- Select Cpoint
Type.
- Click Add to
access the interface to manage the connection points.
The Cpoint option
is not used for SOLIDWORKS Electrical 3D Routing (SOLIDWORKS Routing
only).
SOLIDWORKS Electrical Menu
To create connection points using the SOLIDWORKS
Electrical menu:
- In the SOLIDWORKS Electrical menu, click one of the following:
- Create Cpoint With Circuit
Information
- Create Cpoint Using
Manufacturer Part
- Create Cable Cpoint (EWCable
Point)
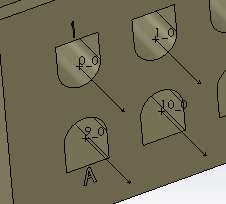
Cpoint Definitions
- CPoint with circuit
information. Lets you manually create the connection points
for wires or cable cores. Enter the circuit number and the connection point
number (see Connection Point Management) and select
the sketch point in the graphics area.
- CPoint from manufacturer
part. Creates connection points for wires or cable cores
from the circuit definition of a manufacturer part. Click Browse to select a manufacturer part from
Manufacturer Part Management and
select the reference from the list. Select the list, material terminals, and
corresponding sketch points, edges, or cylindrical surfaces in the graphics
area.
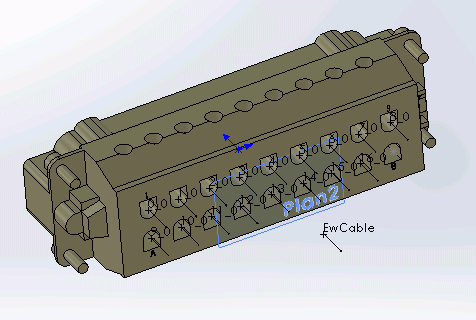
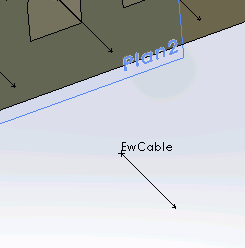
- Cable CPoint. Creates
connection points for cables. It corresponds to the cable insulator cutting
point. Create a parallel plane to the face on which you want to create the
connection point. In the graphics area, select the sketch point, edge, or
cylindrical surface.