Description
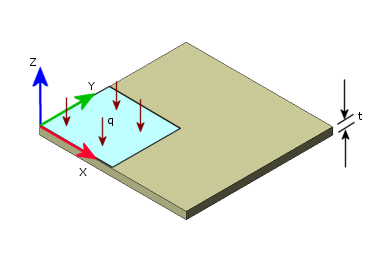
Determine the deflection at the center of a square plate of side 2" and thickness (t). The plate is clamped at its boundaries and subjected to uniform pressure (q). Various span-to-thickness ratios are investigated.

File Name
Browse to drive
letter:\Users\Public\Public Documents\SOLIDWORKS\SOLIDWORKS
version\samples\Simulation
Examples\Verification\Static_12.SLDPRT and open the
file.
Shell Parameters
Thin shell formulation.
Meshing Parameters
Use a Global Size of 0.25 in.
Material Properties
Modulus of elasticity = 1 X 10⁷ psi, Poisson's ratio = 0.3.
Modeling Hints
Due to symmetry, only one quarter of the plate is modeled. A design scenario was defined to model the cases under investigation. To run the analysis, right-click the study icon and select Run Design Scenario. To list the maximum resultant displacements, right-click the Results folder and select Show Design Scenario Summary.
Results
|
Span/Thickness Ratio
|
Deflection (in)
|
|
Theory
|
SOLIDWORKS Simulation
|
| 10
(q = 1.0 psi) |
-2.7518E-6 |
2.7923E-6 |
| 100
(q = 1.0 psi) |
-2.7518E-3 |
2.7923E-3 |
| 1000 (q = 0.01 psi) |
-2.7518E-2 |
2.7923E-2 |
Analytical Solution
D = (E *t3 ) / (12* (1- v2))
Deflection: U = (0.00126 * q * a4 ) / D
where:
-
E: Modulus of Elasticity
- t: Plate thickness
-
v: Poisson's ratio
-
q: Uniform pressure
- a: Plate side
Reference
Timoshenko, S. P. and Woinowsky-Krieger, S., “Theory of Plates and Shells,” 2nd Ed., McGraw Hill, New York, 1959.