|
Demonstrates:
 Many settings are determined by trial and error. Change
settings by small amounts to see the effects gradually. Many settings are determined by trial and error. Change
settings by small amounts to see the effects gradually.
|
|
|
|
|
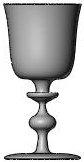
Create a model in SolidWorks. |
|
|
|
|
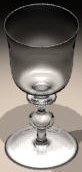
Open PhotoWorks Items in the
Task Pane, select the appearances
folder, and drag reflective clear glass
into the graphics area from the Gloss
folder.
Click  . .
In PhotoWorks Studio, select
Dark Room.
The studio creates a room scaled to the model.
Four spot lights illuminate the model. Render Quality
is set to Medium. |

|
|
|
|
Change the orientation to isometric.
|
|
|
|
|
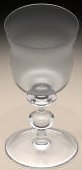
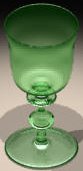
In PhotoWorks Options, on the
Document Properties tab, select
Custom settings under Ray
tracing, and set Number of Reflections
(2) and Number
of Refractions (8).
Number of Reflections
restricts the number of secondary rays for mirror reflections and so should
be low for transparent objects. Number of Refractions
restricts the number of secondary rays cast into the glass appearance
at an angle determined by the index of refraction and so should be high
for transparent objects.
In the Appearances PropertyManager,
Illumination tab, select Dialectric Advanced for the appearance
type. Then set Specular Spread
(0.42) and Transparency
(0.9).
Dielectric Advanced
(the default for glass appearances) accounts for reflection and refraction
of appearances such as glass and takes into account variations in the
thickness of an object. Specular Spread
controls how much light is scattered in directions other than the mirror
direction. Experiment to determine a reasonable value for roughness. Transparency
is the degree to which light penetrates a surface. Glass is naturally
highly translucent. |
|
|
|
|
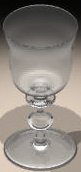
Select Glass for Appearance
type. This appearance property assumes that the glass is of uniform
thickness.
Return appearance type to Dielectric Advanced. |
|
|
|
|
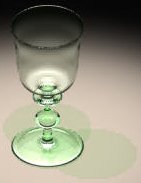
In the Appearances PropertyManager,
Color/Image tab:
You can use a softer color to produce subtler shadows. |
|
|
|
|
In the Scene Editor,
on the Lighting tab, set Global shadow control to Transparent
so color appears in the shadows.
On the Room
tab, select Visible and Reflective for Floor. Clear all others. On the Back/Foreground
tab, select Plain for Background,
and select white for the Background color.
|
|
|
|
|
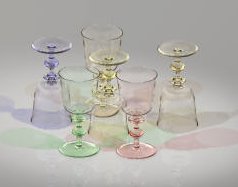
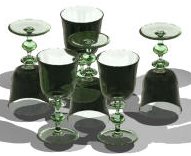
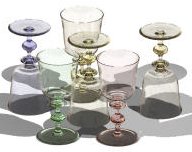
In SolidWorks, create an assembly of multiple glass objects.
In PhotoWorks Studio, select Infinite
White Floor. The scene:
Depicts a spherical environment sized to complement
the model. Sets a lighting scheme automatically. Sets Rendering
Quality to Medium, which
in turn sets the anti-aliasing quality, the number of reflections and
refractions, indirect illumination, and shadow control. |
|
|
|
|
In PhotoWorks Options, on the
Document Properties tab, increase
the Number of Refractions (16).
|

|
|
|
|
In the Appearances PropertyManager,
Color/Image tab, vary the colors
(Primary and Secondary)
of the components in the assembly.
In the Scene Editor, on the
Room tab, adjust the Floor
offset so the glasses sit on the floor.
The distance from the floor is calculated from
the model's bounding box. Assemblies add approximately 20% from the component
boundaries, depending on the size of the model, in creating bounding boxes.
Experiment to find the optimum distance. |
|
|
|
|
In the Scene Editor:
On the Room
tab, change the floor appearance to Porcelain. On the Lighting
tab, set Global shadow control
to Transparent so color appears
in the shadows.
In Option, on the Document Properties
tab, set Anti-aliasing quality
to High to increase the quality
of the final image. |
|
|
|
|
Back to PhotoWorks
Gallery |
|