Notes
Use notes to add text and labels
to drawings.
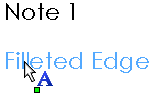
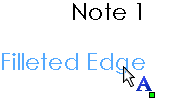
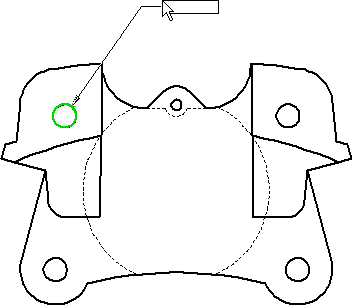
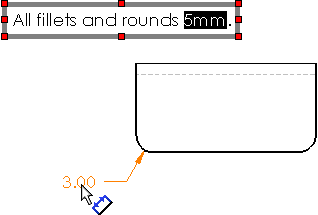
A note can be free floating or fixed, and it can be placed with a leader
pointing to an item (face, edge, or vertex) in the document. It can contain
simple text, symbols, parametric text, and hyperlinks. The leader can
be straight, bent, or multi-jog.
Some items about notes:
To set Note
options for the current document, click
Tools > Options > Document Properties > Annotations > Notes.
You can insert
hyperlinks in notes.
You can link
notes to document, custom, or configuration-specific properties.
You can add balloons to notes.
You can insert annotations in notes. When you
insert an annotation into a note, you can either create a new one in the
Note PropertyManager or select
an existing annotation in the drawing.
You can apply borders to entire notes and portions
of notes.
When you edit a note that contains a variable,
you can either show the variable name or show the contents of the variable.
Click View, Annotation
Link Variables to see the variable name.
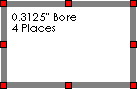
You can
resize the bounding box around a note by typing a note first, then resizing
the bounding box, or vice versa. Bounding boxes are helpful when you want
to shape the note text to a boundary in the title block.
-
When you drag existing text
to align it with other text, the pointer changes to left alignment, center
alignment, or right alignment, depending on where you select the note.
For example, if you select the leftmost side of a note, the pointer changes
to left alignment.
|
|

|
|
|
Left alignment |
Center alignment |
Right alignment |
You can
press Tab at the beginning of
a note to indent the note. However, this does not work in the middle of
a note.
Bend
notes are displayed in drawing views that contain flat patterns of
sheet metal parts.
Empty notes,
which appear on screen as:  , do not appear in print previews
or on printed pages.
, do not appear in print previews
or on printed pages.
To create notes:
Click Note  on the Annotation toolbar, or click Insert, Annotations,
Note. on the Annotation toolbar, or click Insert, Annotations,
Note. Set options
in the Note
PropertyManager. |
|
If the note has a leader, click to place the attachment
point for the leader. Click again to place the note, or click and drag
a bounding box.
|
|
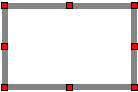
To create a bounding box:
- or -
|
|
Type the text. Press Enter
to add a new line below the current one.
|
|
Set options
with the Formatting
toolbar.
Click in the graphics area outside the note to
complete the note.
With the Note
PropertyManager still open, repeat the steps above to create as many notes
as necessary.
You can change text, properties, and formatting
for each instance of the note.
To add multiple leaders, press Ctrl
while dragging the note and before placing it. The note stops moving and
a second leader appears. While still holding Ctrl,
click to place the leader. Click as many times as necessary to place additional
leaders. Release Ctrl and click
to place the note.
To change the indenting of bulleted or numbered
lists, right-click the note while in edit mode and select Bullets and Numbering.
Click OK
 .
.
To create numbered lists in
notes:
Click Note on the Annotation
toolbar, or click Insert, Annotations,
Note.
Click in
the graphics area to place the note.
Click Number  on the Formatting
pop-up toolbar.
on the Formatting
pop-up toolbar.
Type the
text for the first line, then press Enter.
The list continues in sequential order.
To automatically create lists
without clicking Number on the Formatting toolbar:
Click Note on the Annotation
toolbar or click Insert, Annotations,
Note.
Click in
the graphics area to place the note.
Type the starting number or character for the
list (for example, 1, a, A, i, I).
Type a period, then a space.
Type the
text for the first line, then press Enter.
The list continues
in sequential order.
To change numbered lists to
bulleted lists:
Select
all items in a numbered list.
Click Bullet  on the Formatting
pop-up toolbar.
on the Formatting
pop-up toolbar.
To create stacked text:
Click Note on the Annotation
toolbar, or click Insert, Annotations,
Note.
Click in
the graphics area to place the note.
Click Stack  on the Formatting
pop-up toolbar.
on the Formatting
pop-up toolbar.
Set options
in the Stack
Note dialog box,
then click OK.
Click OK .
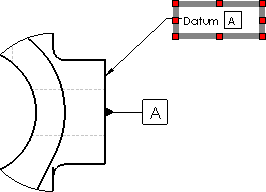
To insert an annotation in a
note from the Note PropertyManager:
Create
or edit an existing note.
Position
the cursor where you want to insert the annotation.
In the
PropertyManager, under Text Format,
click Insert Geometric
Tolerance  , Insert
Surface Finish Symbol
, Insert
Surface Finish Symbol  , or Insert
Datum Feature
, or Insert
Datum Feature  .
.
Set the
properties for the symbol selected, then click OK.
Click OK .
 To edit the annotation, double-click the annotation and edit
it in the PropertyManager or dialog box.
To edit the annotation, double-click the annotation and edit
it in the PropertyManager or dialog box.
To insert an annotation or dimension
in a note from a drawing:
Create
or edit an existing note. |
|
Select
an existing annotation or dimension in the graphics area.
If you select a dimension with a symbol or tolerance, the items are
included in the note. Click OK .
To edit the annotation or
dimension, you must edit the existing annotation or dimension in the drawing
sheet. You cannot edit annotations or dimensions in notes if they were
inserted from an existing annotation or dimension. When you edit the existing
annotation or dimension, all instances of the annotation and dimension
are updated in the sheet.
You can hide the annotation
or dimension using View, Hide/Show Annotations. |

|
To apply borders to entire notes or portions of notes:
Create or edit an existing note.
Select the portion of the note to which you want
to apply a border. If you want a border around the entire note, skip this
step.
In the PropertyManager, under Border,
set options.
Click .
To edit note text:
Double-click the note and edit the text in place.
To edit note properties:
Do one of
the following:
You can add more leaders to an existing note
by holding down Ctrl and dragging
a leader attachment point.
To add a balloon
to a note:
Select a note to edit,
or create a note.
Click the balloon to
insert it in the note.
Optionally adjust the font size of the balloon
text.
Related Topics
Balloons