In this example, you use magnetic mates to connect two train tracks on a floor in an assembly.
The steps in this example are:
- Create a ground plane (floor).
- Add a connection point to the first (straight) train track.
- Add a connection point to the second (curved) train track.
- Insert the tracks into the assembly and use magnetic mates to attach them.
-
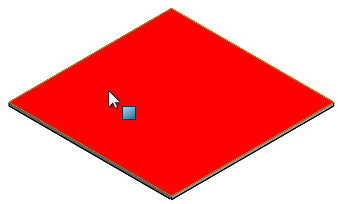
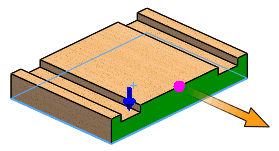
To create the ground plane, with the floor assembly open in the graphics area, click
 .
.
- In the graphics area, click the top face for Ground Plane.
- Click
 .
.
- To add a connection point to the first track, with the straight train track open in the graphics area, click
 .
.
- In the graphics area, select the face shown for Ground Plane.
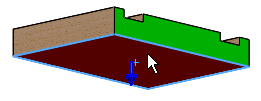
- Select the edge shown for Connect point under Connecting Points.

When you select a linear edge, the midpoint is chosen.
- Select the face shown for Connect direction.
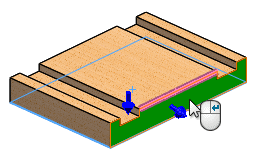
- Click Add Connector.
- Click .
The FeatureManager design tree updates to include Published References containing Ground Plane and Connector1.
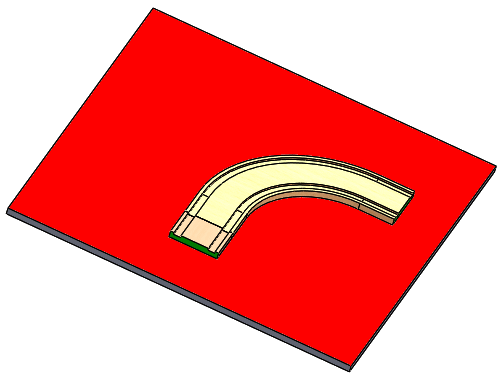
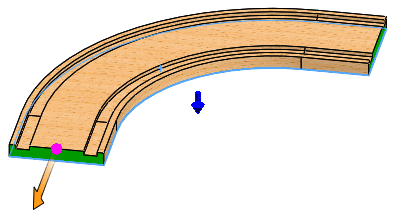
- To add a connection point to the second track, with the curved train track open in the graphics area, click .
- In the graphics area, select the face shown for Ground Plane.
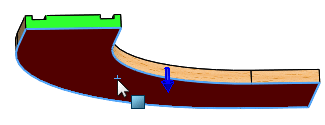
- Select the edge shown for Connect point under Connecting Points.
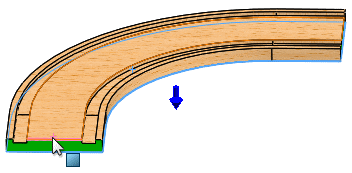
- Select the face shown for Connect direction.
- Click Add Connector.
- Click .
The FeatureManager design tree updates to include Published References containing Ground Plane and Connector1.
- To insert the assets into the assembly, with the floor assembly open in the graphics area, click Insert Components
 (Assembly toolbar) or .
- In the PropertyManager, in Open documents, select the straight track and drag the pointer with the attached track to the graphics area as shown.
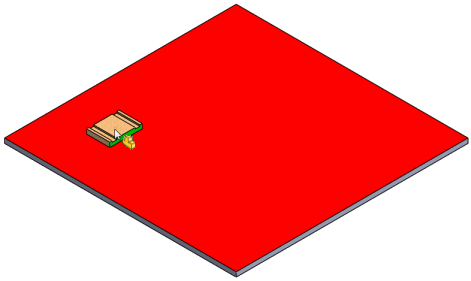
- Click to place the track on the floor.
The track mates to the floor because ground mates are included.
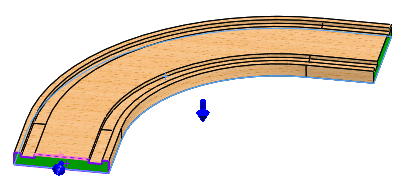
- In the PropertyManager, in Open documents, select the curved track and drag the pointer with the attached track to the graphics area as shown but do not release it. As you drag the curved track towards the straight track, notice the magnetic mate snap line that appears as you drag the curved track closer.
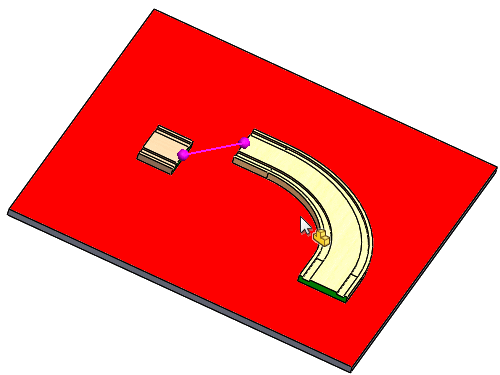
- Click to release the curved track so that it snaps to the straight track.