You can use to create a single blurred image based on a selected frame in a Motion Study animation.
To create motion blur using Final Render:
-
Add in PhotoView 360.
- Open an existing part or assembly motion study with moving components.
- Click to place the time bar in the motion study.
- Click or click Final Render
 in the Render Tools CommandManager.
- In response to the screen message that appears, click Include Motion Blur in the final rendering.
- In the Motion Blur Parameters dialog box, use the sliders to set the values for:
- Blur Length
Controls the length of the motion blur effect.
The default is 50, which is similar to a camera set with a 180 degree shutter, resulting in the shutter being open for half of the exposure time of the frame.
- Blur Offset
Controls the center position in time where the motion blur sample is taken.
The default is 0.
- Click OK.
The PhotoView 360 preview and
Final Render windows open.
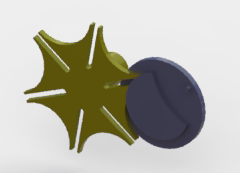
The preview window shows the still image:
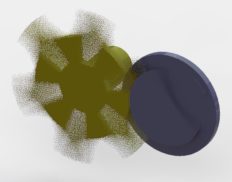
The Final Render window shows the blurred image:
- If you are satisfied with the image, click Save Image in the Final Render window.