Add Loft Section
You can add one or more loft sections to an existing loft.
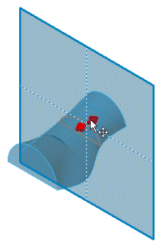
When you add a section, it creates a loft section and a temporary plane.
The loft section automatically creates pierce points at its end points
and intersection points with guide curves. You can drag the plane to position
the new loft section. You can also use a pre-existing plane (created before
the loft feature) to position the new loft section.
Once you position the new loft section, you can use the shortcut menu
to edit the new loft section. Edit the loft section as you would any other
sketch element (dimension, add relations, modify shape, and so on).
To add a loft section:
-
Right-click along the path of the existing loft where you want to
add the new loft section, and select Add
Loft Section.
The Add Loft Section PropertyManager
appears with the current loft sections listed.
In the graphics area, a temporary plane appears with the new loft
section.
 You can click OK
 in the PropertyManager after adding the new loft section
if you do not need to specify a different plane, reposition the loft section,
or use the edit functions.
in the PropertyManager after adding the new loft section
if you do not need to specify a different plane, reposition the loft section,
or use the edit functions.
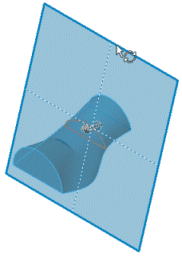
If you want to use the temporary plane, position
the plane along the path of the existing loft by doing one of the following:
Drag the plane along the path of the existing
loft.
Place the pointer at one of edges of the plane.
The pointer changes to  . This allows you to change the angle
of the plane and modify the shape of the new loft section.
. This allows you to change the angle
of the plane and modify the shape of the new loft section.
|
|
|
|
Drag plane |
Rotate plane |
If you want to use another previously created
plane, select Use selected plane and
select a plane  .
.
Once you position the new loft section, you can
do either of the following:
Click OK
in the PropertyManager to create the loft section.
-
Use the shortcut menu and select Edit
Loft Section to add relations, dimension, and so on
If you select Edit Loft Section,
a dialog box appears, allowing you to go Back
(to reposition the plane), Cancel
(the add section process), or Finish.
-
Once you define the new loft section, click Finish.
The sketch used to add the new loft section appears in the loft
feature.
You can delete any sketch you added using Add
Loft Section.
To delete a new loft section from a loft:
Right click the loft icon in the FeatureManager
design tree and select Edit Feature.
In the PropertyManager, select the new sketch
under Profiles  and
press Delete.
and
press Delete.
-
Click OK .
This removes the loft sketch from the loft section, and places it
above the loft feature in the FeatureManager design tree. It does not
remove the loft section.
To permanently remove the loft section and the
sketch from the model, do the following:
Related Topics
Loft Overview
Loft PropertyManager