Deform - Point Examples
You can combine different point deform options to achieve different
results. The examples in this topic demonstrate only some of these options.
See Deform - Point Options for details
on how these options interact with each other and on the models to deform.
 Point deformation that affects a small area
may not display if you are using the default image quality settings. To
increase the quality, click Tools,
Options, Document
Properties, Image
Quality. Move the Shaded and
draft quality HLR/HLV resolution
slider to the right, or select Optimize
edge length.
Point deformation that affects a small area
may not display if you are using the default image quality settings. To
increase the quality, click Tools,
Options, Document
Properties, Image
Quality. Move the Shaded and
draft quality HLR/HLV resolution
slider to the right, or select Optimize
edge length.
To deform a model using point:
Click Deform
 on the Features toolbar, or click Insert,
Features, Deform.
on the Features toolbar, or click Insert,
Features, Deform.
In the PropertyManager, under Deform
Type, select Point.
Under Deform
Point, select one of these entities in the graphics area for Deform Point  :
:
Point on a face or
plane
Point on an edge
Vertex
Point in space
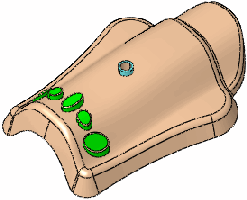
Examples of Deform
Point selections:
|
Point on Face or Plane |
|
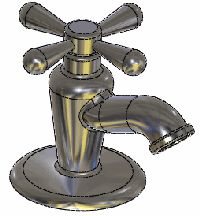
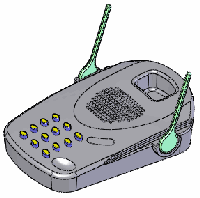
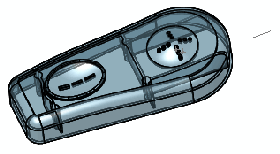
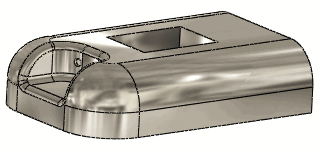
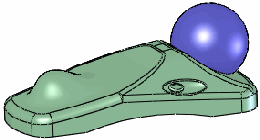
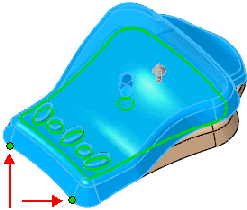
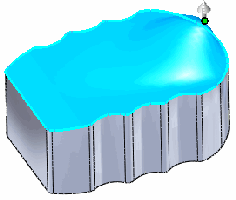
Initial part
Point on face is a simple method for quickly making changes to complex
models.
Point on face is useful for performing multiple design iterations and
adding complex feature changes to models. |
|
|
Select a point on a face or plane. The
pull direction is normal to the face. |
|
|
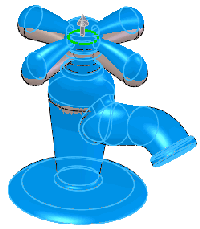
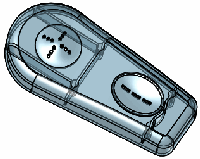
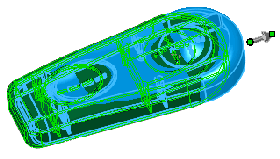
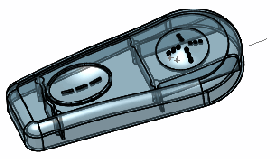
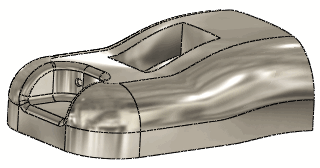
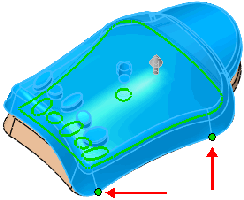
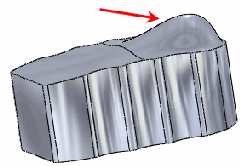
Result of point-on-face deform
Note the degree of change that can be made with a point deform operation. |

|
|
Point on Edge |
|
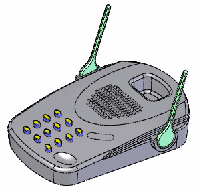
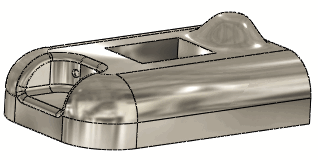
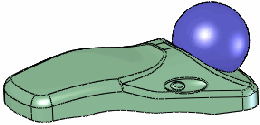
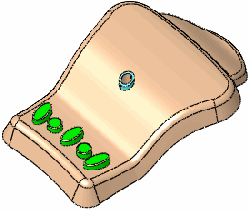
Initial part
Using a point on an edge allows a more predictable movement and location
for a deform. |
|
|
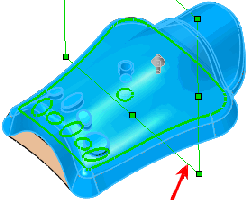
Select a point on an edge. The pull direction
is calculated as an averaged normal from the two adjoining faces.
If you move the point along the edge, the center of the deform moves
with it. |
|
|
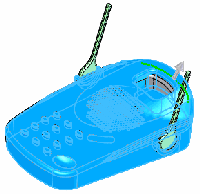
Result of point-on-edge deform
Point-on-edge deform allows you to make complex and quick design changes
to any type of model. |
|
|
Point on Vertex |
|
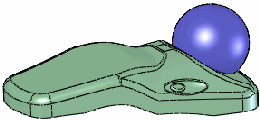
Initial part
Using a point on a vertex is a predictable
way to locate the deform when the normal to adjacent faces is the desired
pull direction. |
|
|
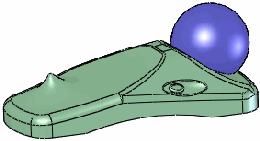
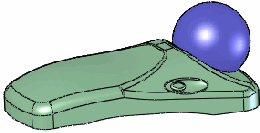
Select a vertex. This example uses the
vertex of a rib.
The pull direction is an average normal
of all adjacent faces. |
|
|
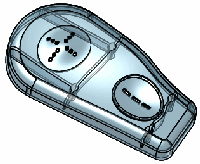
Result of point-on-vertex deform |
|
|
Point in Space |
|
Select a point in space for Deform
point and select one of the following for Deform direction:
edge sketch line two points or vertices plane planar face
(Point in space and sketch line for direction shown) |
|
|
Preview of deform using a point in space
The direction is determined by the sketch
line in this case.
If the point you select is on a plane, the pull direction is normal
to the plane. |
|
|
Result of deform using a point in space |
|
When you use a point in space as the Deform
point , select a linear edge, two points or vertices,
a planar face, or a plane as the Deform
direction.
With a point on a face, edge,
or vertex, you only need to select a Deform
direction to use a different direction than the default. If necessary,
click Reverse deform direction
 .
.
In the Deform
distance  box, set a value.
Under Deform
Region:
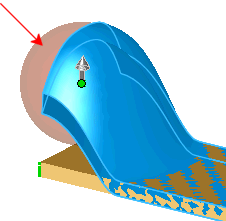
In the Deform
radius  box, set a value. This radius value determines
a spherical influence around the selected point.
box, set a value. This radius value determines
a spherical influence around the selected point.
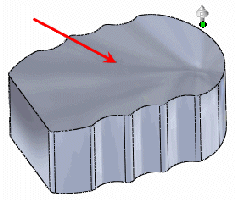
|
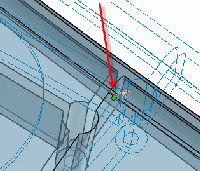
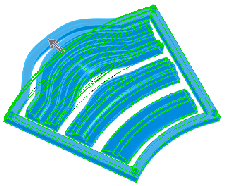
Point deform showing how the Deform
radius value around the point influences the shape.
The theoretical sphere (red arrow) represents
the value of the Deform radius
. |
|
Select Deform
region to confine the deformation to an area enclosed by the perimeter
of the selected face.
When you select a point on
a face and select Deform region,
by default you confine the deformation
to the area enclosed by the perimeter of the face selected. When
you select a point on an edge, vertex, or point in space, the deformation
is not directly affected by Deform region.
With Deform region selected, you
can also select Fixed curves/edges/faces
 and any Additional
faces to be deformed
and any Additional
faces to be deformed
 .
.
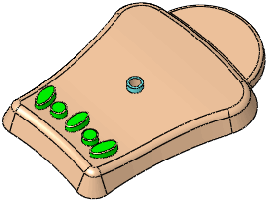
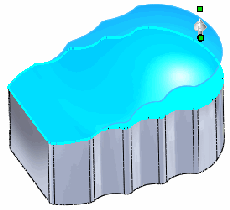
Example of how Deform
region affects the deform
|
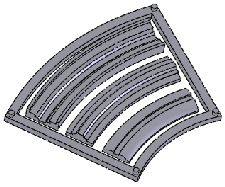
Initial Part
|
|
|
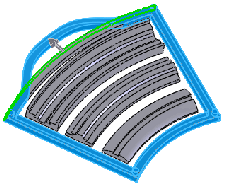
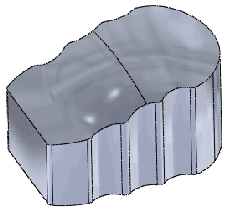
Deform region cleared
|
|
|
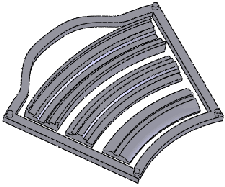
Result with Deform region cleared
When using a point on a face, clearing or selecting Deform
region affects the deformation. |
|
|
Deform using the same point with Deform region selected. |
|
|
If you select an edge or vertex, clearing
or selecting Deform region does
not affect the deformation.
This preview (edge selected) is the same
with Deform region selected or
cleared. |
|
|
|
|
Initial multibody part |
|
|
|
|
Single body selected |
Result of single body deform |
|
|
|
|
All four bodies selected |
Result of multibody deform |
Under Shape Options:
Select a level of stiffness. Stiffness determines
the rigidity of the deform shape, whether constrained within a face (Deform region selected) or free (Deform region cleared). The level of
stiffness to apply is determined by the shape you want to create.
|
All stiffness examples use a Deform
distance of 10, Deform
radius of 50, and
the same point on the face. |
|
Deform region
selected |
Deform region
cleared |
|
|
|
|
Stiffness - Minimum

|
|
|
|
|
Stiffness - Medium

|
|

|
|
|
Stiffness - Maximum
 |
When Deform
region is cleared, you can optionally select a Deform
axis  to further control the shape of the deformation.
The Deform axis is defined by selecting a linear edge, two points or vertices,
a sketch line, a planar face, or a plane. This results in a bending-like
deformation, parallel to the axis you select.
to further control the shape of the deformation.
The Deform axis is defined by selecting a linear edge, two points or vertices,
a sketch line, a planar face, or a plane. This results in a bending-like
deformation, parallel to the axis you select.
|
Initial part |
|
|
Point deformation with
two vertices (red arrows) selected for Deform
axis . |
|
|
Result using two vertices to create an axis line |
|
|
Point deformation using an axis line defined by two different vertices
(red arrows) for Deform axis . |
|
|
Result using the new axis line |

|
|
Point deformation using a plane (red arrow) for Deform
axis . The axis of bend is perpendicular to the
plane and centered around the centroid of the bodies. |
|
|
Result using a plane for the axis line |
|
When Deform
region is selected, clear Maintain
boundary to achieve the following:
|
Initial part
A point in space deformation is used.
The deform face (red arrow) is the same in all examples. |
|
|
Maintain boundary cleared
Additional faces only selected
The
top face is selected
for Additional faces to be deformed
|
|
|
Result:
Only the top face is deformed, while the sides are essentially extruded
to meet the top face. |
|
|
Maintain boundary selected |
|
|
Result
Only the top face is affected. All other faces remain unchanged. |
|
Move the Shape
accuracy  slider to control surface quality. Increasing
the quality also increases the success rate of the deform feature. For
example, if you get an error message Could
not replace geometries, move the slider towards the right. Move
the slider only as needed; increasing surface accuracy decreases performance.
slider to control surface quality. Increasing
the quality also increases the success rate of the deform feature. For
example, if you get an error message Could
not replace geometries, move the slider towards the right. Move
the slider only as needed; increasing surface accuracy decreases performance.
Click OK
 .
.