Move, Copy, Rotate, Scale, or Stretch
Move, copy, rotate, scale, or
stretch entities in sketches and drawings with the Move-Copy-Rotate-Scale-Stretch
PropertyManager.
 The Move
and Copy operations do not create relations. To create
relations, you must add
relations.
Move or Copy Sketch Entities
To move or copy entities:
In sketch mode:
Click Move
Entities  (Sketch toolbar) or Tools,
Sketch Tools, Move.
- or -
Click Copy
Entities  (Sketch toolbar) or Tools,
Sketch Tools, Copy.
 Dimensions are moved or copied to the new location with the
entities. Relations are moved or copied only if you select Keep
relations.
In the PropertyManager, under Entities
to Move or Entities to Copy:
Select sketch entities for Sketch
item or annotations.
Select Keep
relations to maintain relations between sketch entities. When cleared,
relations are broken only between selected entities and those that are
not selected; relations among the selected entities are maintained.
-
Under Parameters:
|
Sketch Type |
Instructions for modifying
parameters |
|
2D Sketch
3D Sketch On Plane |
Do one of the following:
Select From/To,
click Start point to set a Base point  , and then
drag to position the sketch entities. , and then
drag to position the sketch entities. Select X/Y
and set values for Delta X  and Delta Y and Delta Y  to position the sketch entities. to position the sketch entities.
Click Repeat to modify the
position of the sketch entities again by the same distance. |
|
3D Sketch |
Using the 3D triad:
For details on using the 3D triad to move or copy entities, see
Triad.
|
|
Using numeric values:
Under Translate,
specify Delta X  , Delta Y , Delta Y  , and Delta Z , and Delta Z  . . Click Repeat
to modify the position of the sketch entities again by the same distance. |
Click  .
.
Rotate Sketch Entities
To rotate sketch entities:
In sketch mode click Rotate
Entities  (Sketch toolbar) or Tools,
Sketch Tools, Rotate.
In the PropertyManager, under Entities
to Rotate:
Select sketch entities for Sketch
item or annotations.
Select Keep
relations to maintain relations between sketch entities. When cleared,
relations are broken only between selected entities and those that are
not selected; relations among the selected entities are maintained.
-
Under Parameters:
|
Sketch Type |
Instructions
for modifying parameters |
|
2D Sketch
3D Sketch On Plane |
Click Base
Point (Rotate Point Defined) to set a Base
point  , and then click in the graphics area to set
the Center of rotation. , and then click in the graphics area to set
the Center of rotation. Set a value for
Angle  . . |
|
3D Sketch |
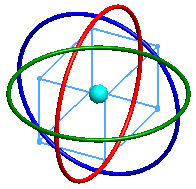
To rotate the entities using the 3D triad,
select a ring and drag.

To change the rotation origin, drag the center ball.
For details on using the 3D triad to rotate entities, see Triad.
|
|
To specify the rotation numerically,
specify values for rotation reference, origin, and angle directly in the
PropertyManager.
If sketch entities were selected when you clicked Rotate,
these items appear:
If no entities were selected, these items appear:
When you click Rotation Reference
and then select a line, Rotation Reference
Angle appears and Rotation Origin
and Rotation Angle disappear.
To display Rotation Origin and Rotation
Angle again, right-click Rotation Reference
and then select Clear Selections.
|
Scale Sketch Entities
To scale sketch entities:
In Edit Sketch
mode click Scale Entities
 (Sketch toolbar) or Tools,
Sketch Tools, Scale. (Sketch toolbar) or Tools,
Sketch Tools, Scale. |
In the PropertyManager, under Entities
to Scale, select sketch entities for Sketch
item or annotations. |
Under Parameters:
Click Base
Point (Scale Point Defined) to set a Base
point  , and then click in the graphics area to
set the point to Scale about. , and then click in the graphics area to
set the point to Scale about. Set a value for Scale Factor  . For example,
specify 2 for double size, 0.5 for half size, and so on. . For example,
specify 2 for double size, 0.5 for half size, and so on.
To keep the original sketch entities and
create copies of the scaled
entities:
Select Copy.
Specify a value for
Number of Copies  . . |

|
Click  . . |
Stretch Sketch Entities
To stretch sketch entities:
In Edit Sketch
mode click Stretch Entities  (Sketch toolbar) or Tools,
Sketch Tools, Stretch
Entities.
In the PropertyManager, under Entities
to Stretch, select sketch entities for Sketch
item or annotations.
-
Under Parameters, select
either From/To or X/Y:
|
Parameter |
Instructions for modifying
parameters |
|
From/To |
Click Base
point  and then click on the sketch to set a base
point. and then click on the sketch to set a base
point. Drag to stretch the sketch entities.
When you release, the entities stretch
to that point and the PropertyManager closes.
|
|
X/Y |
Set values for Delta
X  and Delta Y and Delta Y
 to stretch the sketch entities. to stretch the sketch entities. Click Repeat
to stretch the entities again by the same distance. Click  . . |
Related Topics
Specifying
Note Position Using Move