ScanTo3D Overview
Using the SolidWorks software’s ScanTo3D functionality, you can open
scan data from any scanner (mesh or point cloud files) or curve data from
mathematics software, prepare the data, then convert it into a surface
or solid model.
 When you open the scan data,
you can open it as a new part document or import it into the currently
active part document. Click Options
in the Open dialog box and set
the options.
ScanTo3D significantly reduces the time required to build complex 3D
models from non-digital data. Designers can use ScanTo3D for various purposes:
|

|
|
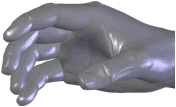
Example of a solid created from scanned data of a hand, using the Surface
Wizard's Automatic creation. |
Consumer product designers - Create quick representations
of physical components made from clay, foam, etc.
Machine designers - Create quick references to
OEM parts.
 ScanTo3D is available only
in SolidWorks Premium. To activate ScanTo3D, click Tools,
Add-Ins, and select ScanTo3D.
 If you have a NextEngine scanner, click NextEngine Scan
  (ScanTo3D
toolbar) or Tools, ScanTo3D,
NextEngine Scan to start NextEngine
scanning.
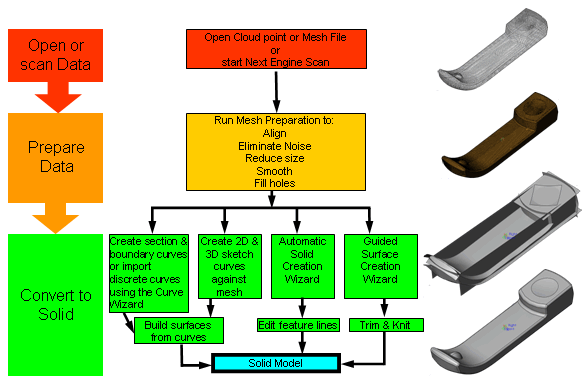
Two methods for converting scan data to a solid model:
Semi-manual creation: Direct Mesh Referencing
Direct
mesh referencing is useful for very complex surfaces, such
as consumer products.
Use the Surface Wizard's Automatic
creation to automatically create surfaces from a mesh. The
Surface Wizard's Guided creation
requires more user interaction and works well for models for mostly analytical
shapes (simple shapes, such as machined parts), but not for complex parts.
|

|

|

|

|

|

|

|
|
Mesh |
|
Sketches |
|
Surfaces |
|
Solid |
Open the scan data (mesh or point cloud file). Prepare the mesh using the Mesh Prep Wizard to
create a mesh feature. Section the mesh using the Section
View  tool (View toolbar) tool (View toolbar) Sketch 2D and 3D curves on the mesh feature. Build surfaces using the curves. Use the Curve Wizard
to create section and boundary
curves. You can also import and edit IGES, IBL, CSV, and TXT files containing
point data that defines discrete curve sets Analyze and refine the surfaces using the Deviation
Analysis tool. Trim and knit the surfaces. Create the solid model. |
Semi-automated creation using wizards
The Mesh Prep and Surface Wizards guide you through the ScanTo3D process.
If you already have clean mesh data, use just the Surface Wizard to create
a solid model. Use the Surface Wizard’s automatic creation for anatomical
and organic shapes. Use guided creation for analytical faces. Use the
Deviation
Analysis tool to analyze and refine surfaces.
Open the scan data (mesh or point cloud file).
Prepare the mesh using the Mesh Prep Wizard to
create a mesh feature.
Use the Surface Wizard to create surfaces from
the mesh feature using automatic or guided creation.
Trim and knit the surfaces.
Create the solid model.
Overview of the ScanTo3D Process

To open scan data:
Click Open
 and select one of the following types of scan data files
in Files of type:
 ScanTo3D automatically imports
textures from 3D Studio .3ds,
.obj, and .wrl
files provided the textures are clearly linked to the mesh file. Otherwise,
the mesh imports with no textures. You can specify the location of texture
files in the Import
Options dialog box..
Browse to a file
for File name.
Click Options,
set the import
options, then click OK.
Click Open.
Mesh
 or Point Cloud
 appears in the FeatureManager design tree.
To run the Mesh Prep Wizard:
With a mesh or point cloud file open, click Mesh Prep Wizard  (ScanTo3D
toolbar) or Tools, ScanTo3D,
Mesh Prep Wizard.
Follow the wizard to prepare a mesh feature from
which you extract surfaces.
After preparing the mesh, you can choose
to continue with the Surface Wizard (The Launch Surface Wizard option
is selected by default).
To run the Surface Wizard:
Open a file that contains a mesh feature and click
Surface Wizard  (ScanTo3D
toolbar) Tools, ScanTo3D,
Surface Wizard.
Follow the wizard which has two methods to extract
surfaces:
Automatic
creation. Uses a single-step process to automatically create
a solid model. This option is good for anatomical and organic shapes.
Guided
creation. Uses a multi-step process to create surfaces, allowing
you more control over the surfaces. This option is good for analytical
surfaces or when you want to have more control over the surfaces.