Loft with Split Line
To create a loft using a split line:
-
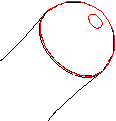
Use a split line to create a non-planar profile on a model face.
For example, create a circle on a plane, then project the circle onto a non-planar face.
-
Set up the planes needed for the profile sketches. Use existing planes, or create new planes. The planes do not have to be parallel.
-
Sketch the profiles.
For example, sketch a point on plane 4.
 You can create a loft to a point, even if the point is part of a sketch containing other sketch entities.

-
Click one of the following:
-
Lofted Boss/Base  on the Features toolbar or Insert, Boss/Base, Loft
-
Lofted Cut  on the Features toolbar or Insert, Cut, Loft
-
Lofted Surface  on the Surfaces toolbar or Insert, Surface, Loft
-
In the PropertyManager:
To select the profile sketch on the non-planar face, you must use the Select Group  tool in the
SelectionManager
to select the individual profile sketch edges.
tool in the
SelectionManager
to select the individual profile sketch edges.
-
Click OK  .
.