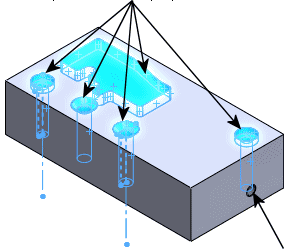
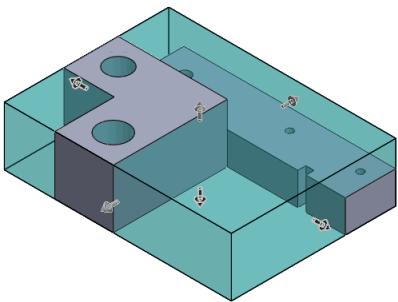
You can view how the Costing tool categorizes required operations and modify operations from the CostingManager for single-body weldments, or structural members.
To display the Weldments CostingManager for single-body weldments, or structural members:
- In a weldment, click Costing
 (Tools toolbar or the Evaluate tab on the CommandManager) or .
- If the software does not calculate a cost estimate automatically, select options in the Costing Task Pane to estimate the part cost.
- Select the CostingManager tab on the left side of the SOLIDWORKS software window.
Custom Operations
 |
Add Custom Operation |
Lets you create additional operations in the machining template to add to the cost calculation. |
Cost/Time Display
 |
Show Cost |
Displays the cost for each operation to manufacture the part. |
 |
Show Time |
Displays the time required for each operation to manufacture the part. |
Setup
The Setup  folder contains the costs associated with manufacturing setups such as setting up machines to run a batch (lot) of parts. Each operation to manufacture the part requires setup costs. The setup costs depend on the time required to set the part on the machines. The setup costs include the machine cost per hour because the machine cannot be used during setup, and labor cost for the effort to set the part. If the setup cost is in the machining template, it is recognized by the Costing tool.
The Setup  folder can have setup costs defined in the template for library features or custom features. The folder groups setup operations as Operations Setup
  , Custom Setup
  , and Load and Unload Setup
  . The folder also groups all the cutting, milling, and drilling setup costs into appropriate setup operations. For the cutting, milling, and drilling setup costs, a generic 5% of the total operation cost is assumed, which is the amount of time to remove the material for this feature multiplied by the labor and machine cost.
For example, if there is a pocket on the top face of the part to be milled, the pocket is listed in the Mill Operations  folder and its setup is listed in a Setup Operation
  folder in the Operations Setup
  and Load and Unload Setup
  folders. All features that share the same operation direction are placed in the same Setup Operation
  . For instance, a pocket and hole on the top face are in one Setup Operation
  , while a facing operation and a hole on the right face are grouped in another Setup Operation
  .
.
Vertical direction operations are grouped under one Setup Operation  . . |
 |
Horizontal direction operations are grouped under another Setup Operation  . . |
The setup cost is per part.
You can drag and drop individual setup costs to different setup operations in the Setup  folders, or you can place them in new setup operations.
End Cuts
The End Cuts  folder contains the individual end cuts of the structural member.
Mill Operations
The Mill Operations  folder contains operations such as pocket, face, and chamfer milling.
Milling operations are calculated using a material removal rate (MRR). Expand the Mill Operations  folder and hover over a mill operation to see how the cost is calculated. Select a mill operation to highlight the geometry in the model.
When you apply the Costing tool to a part that is machined from a block or cylinder stock type, the software calculates the difference between the stock material and the actual part, excluding machined features such as holes and pocket features. This difference creates Volume  features, which contribute to the cost of the part as a result of the required milling operations.
Any machining volume that is unaccounted for is considered a Volume  feature. The Volume
  feature is calculated as Stock body volume - (Cost body volume + Machining features volume).
Volume 
features account for the cost of tooling a part from a block or cylinder. The cost of the machined part includes the following:
- The cost of the stock body
- The cost of tooling a volume of material from the stock body
The volume of material removed from the stock body to produce the part defines the
Volume 
features.

The Costing tool computes the contribution of the Volume  features to the total cost of machining the part.
You can change the tool used to create a Volume  feature to adjust the cost. You can right-click a Volume
  feature and change the tool to modify the cost calculation. You might also have a Volume
  feature appear in the No Cost Assigned
  folder.
Hole Operations
The Hole Operations  folder contains drilling and tapping operations needed to create holes. Appropriate drill and tap sizes are selected from the machining template to best fit the holes in the part. If the proper drill and tap sizes are not in the template, a warning icon
  appears. You can correct the warning by editing the machining template and adding the appropriate drill and tap sizes.
Hole operations are calculated using a material removal rate (MRR) for drilling and tapping. Expand the Hole Operations  folder and hover over a hole operation to see how the cost is calculated. Select a hole operation to highlight the geometry in the model.
Custom Operations
The Custom Operations  folder contains any operations that are not automatically recognized by the Costing tool. A custom operation cost can be calculated as a cost associated with the entire part, the part weight, specific part faces, part edges, a single stroke operation, or time.
For example, if the part is to be painted, you can assign a cost to paint the entire part or specific faces of a part. If you are painting specific faces, include a cost per area such as dollars per square inch to paint the part.
You can set custom operations in the machining template and apply the operations automatically or manually.
You can also create custom operations without editing the template by clicking Add Custom Operation  in the CostingManager. See Custom Operations for Machined Parts.
Each item in the folder has the operation name you selected and the selection type.
Hover over a custom operation to see the equation used to calculate the cost.
Library Features
The Library Features  folder contains all library features in the part. The cost of each item is calculated as the cost per feature as defined in the machining template.
Hover over a library feature  to see the equation used to calculate the cost.
No Cost Assigned
The
No Cost Assigned 
folder contains features that:
- are not recognized by the Costing tool
- are not defined in the machining template
- have a zero cost
If you set a feature cost to zero, the feature moves to this folder. If you assign a cost to a feature in the No Cost Assigned  folder, the feature moves to the appropriate folder and appears in italics with an asterisk to indicate an override. If a feature that you assign a cost to is not a cut path, mill operation, hole operation, or library feature, then that feature is assigned to the Custom Operations
  folder.