You can take snapshots of locations that you want to return to.
Snapshots are available only in assemblies. You can take snapshots while the assembly is in resolved, lightweight, or Large Design Review mode. You can take snapshots from within an active walk-through.
A snapshot captures the state of the graphics area, similar to a custom named view, and saves it in a Snap  feature on the DisplayManager tab
  of the Manager Pane. Unlike a custom named view, if some parts are hidden when you take a snapshot, those parts are always hidden when you return to that snapshot.
Snapshots capture the view orientation and zoom, the hide/show state of components, section views, and exploded views. You can view snapshots in resolved, lightweight, and Large Design Review modes, regardless of the mode they were created in.
When you take a snapshot from within an active walk-through, the camera angle is recorded in addition to the view orientation of the assembly and hide/show state of components. When you activate a snapshot that was created inside a walk-through, the walk-through opens automatically.
Click Take Snapshot  (View toolbar) or , or press Alt + Spacebar.
In the
Snapshots folder

, you can:
- Right-click a snapshot
 and add a comment (140 characters maximum)
- Double-click a snapshot to return to that view of the assembly
- Click-pause-click a snapshot to rename it
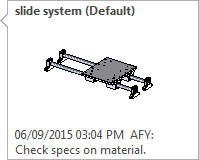
- Hover over a snapshot to see a preview and comments

A snapshot named Home is created whenever you open an assembly. If you make changes such as hiding components, zooming, and rotating, you can double-click the Home snapshot to return the graphics area to the state it was in when you opened the assembly. You cannot remove or rename the Home snapshot and you cannot add comments to it.