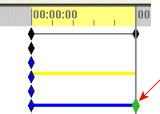
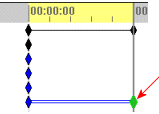
The timeline is located to the right of the MotionManager design tree. The timeline displays the times and types of animation events in the motion study.
User Interface
As you position the time bar, move components in the graphics area, add simulation elements, or change the visual properties, the timeline displays changes using key points and changebars.
The timeline is divided by vertical grid lines corresponding to numerical markers showing the time. The numerical markers start at 00:00:00. The time scale depends on the size of the window and on the zoom level.

Previews
To view the components at a particular time, click that time on the timeline. This sets the time bar to that time and displays a preview of the component positions.
When setting the time bar, do not click on a key point.
Shortcuts from the Timeline
After you position the time bar and make changes to a motion study, you can edit the animation by dragging the key points.
Timeline Area
Right-click in the timeline area and select any of the following:
- Place Key
 . Add a new key point at the pointer location and drag the key point to adjust the location.
The new key properties match the current model state:
- Position of the selected component
-
View orientation
-
Properties of the selected camera, light, or mate
- Paste. Paste a previously cut or copied key point.
- Select All. Select all keys points to group them. You can then:
- Drag them as a group.
-
Right-click a key point and select Delete to return the animation to its pre-animation state.
- Animation Wizard
 . Open the Animation Wizard.
A red timeline indicates a motion solver failure. If the timeline is red, try one of the following:
- Suppress or remove unnecessary mates.
-
Simplify the mates.
-
Specify the motion differently, for example, by using a motor instead of a component key.
Key Points
Select and drag key points to move them along the timeline:
- Ctrl + drag key points to copy them to a new time.
- Drag the key (top row) to change the duration of the motion study without changing any of the other key point locations.
- Alt + drag the key to scale the motion study, including any other key points.
When you drag the 0 sec key point of an unsuppressed mate, the software suppresses the item at 0 seconds and unsuppresses it at the new starting point. When you drag the 0 sec key point of a light, motor, or force that is on, the software turns the item off at 0 seconds and on at the new starting point.
Right-click any key point along the timeline to do the following:
- Cut, Copy, Paste, or Delete. These functions are available with the following restrictions:
-
Cut or Delete. Unavailable for key points at the 00:00:00 mark.
- Paste. Available anywhere along the timeline after you select Cut or Copy.
- Select All. Available for any key points.
- Multiple key points. Press and hold Ctrl to select more than one key point.
- Select Reverse Path to reverse the animation of the entities that correspond to the selected key points:
- The position and any visual properties are reversed.
- No additional reverse animation sequence is created.
- Replace Key. Updates the model status for selected key points. For example, if you define an animation with a mate suppressed, and then unsuppress the mate, some key points may turn red because the mate, as it was defined earlier, prevents movement or visual changes.
Redefining the Key
To redefine the key, place the time bar on the red key. Right-click and select Replace Key. Redefines the key to the position allowed by the mate.
- Suppress. Excludes the selected key and related keys from their assigned function.
 |
 |
| Suppress cleared
|
Suppress selected |
Interpolation Mode
Select an interpolation mode to control the acceleration or deceleration of a component or a visual property during the playback.