You can specify sets of mate values to define various component positions.
To add positions in Mate Controller:
- Open install_dir\samples\whatsnew\assemblies\mate_controller\mate_controller.sldasm.
- Click Mate Controller
 (Assembly toolbar) or .
-
In the PropertyManager, under Mates, click Collect All Supported Mates
 .
.
Three mates appear in the list.
If you want to work with only a few of the supported mates in an assembly, do one of the following:
-
Before opening Mate Controller, preselect the mates.
- After opening Mate Controller, select mates from the flyout FeatureManager design tree.
Under
Mates Positions, the current values for the mates are shown. These values specify
Position 1.
| Mate |
Value |
|---|
| Distance1 |
0.00mm |
| Angle1 |
0.00deg |
| LimitAngle1 |
90.00deg |
- Enter the mate values for the next position (Position 2):
| Mate |
Value |
|---|
| Distance1 |
30.00mm |
| Angle1 |
0.00deg |
| LimitAngle1 |
90.00deg |
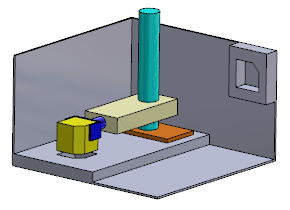
In the graphics area, as you change the mate values, the components move to the new positions.
- Under Mate Positions, click Add Position
 .
.
- In the Name Position dialog box, enter Position 2 and click OK.
Position 2 is created from the mate values you entered.
- Enter the mate values for the next position (Position 3):
| Mate |
Value |
|---|
| Distance1 |
150.00mm |
| Angle1 |
90.00deg |
| LimitAngle1 |
10.00deg |
- Click Add Position .
- In the dialog box, enter Position 3 and click OK.
Position 3 is created.