Manipulate inserted components
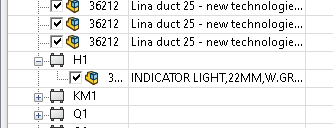
All listed components have a checkbox beside them. When inserted into
the graphical area, this checkbox is automatically checked. This acts
as a quick reference to which components have already been inserted. When
this option is used, the list contains only the components left to be
inserted.

The contextual menu commands change to provide the following options:
Add►

|
Component: Opens
the Component
properties dialog box allowing you to create the component
(mark and manufacturer part). |

|
Component manufacturer
part: Opens the Manufacturer
part selection dialog box allowing you to search for a new
manufacturer part. Then an option dialog box opens asking you
to enter the quantity. |

|
Terminal strip:
Opens the Component
properties dialog box allowing you to create a terminal strip. |

|
Connector: Opens
the Component
properties dialog box allowing you to create a connector. |

|
PLC: Opens the Component
properties dialog box allowing you to create a PLC. |

|
PLC manufacturer part:
As the Component manufacturer
part command, you can create from a PLC manufacturer part. |

|
Printed circuit board:
Opens the Component
properties dialog box allowing you to create a printed circuit
board. |

|
Search component:
This command allows you to find
a component in the list of components for the electrical project
by using filters. |

|
Zoom: Allows you
to zoom around on the selected component. |

|
Hide/Show: Hides
the selected component if the component is not hidden or shows
it if it is hidden. |

|
Open 3D Part: Opens
the 3D file representing the component. |

|
Replace: Allows
to select another file to represent the component. |

|
Dissociate: Dissociates
the listed component from the assembly representing it in the
graphical area. This is useful when there is an incorrect association. |

|
Download SOLIDWORKS
3D part: Opens the CAD file
downloader to download a 3D part. |

|
Properties: Opens
the Component
properties dialog box allowing you to edit the component (mark
and manufacturer part). |

|
Change location:
Changes the location associated
with the component. |

|
Change function:
Changes the function associated
with the component. |

|
Insert in terminal strip:
Inserts the component in a terminal strip. Select the terminal
strip in the terminal strip selector. |

|
Assign manufacturer parts:
Assigns one or more manufacturer
parts to the component. |

|
Delete manufacturer parts:
Removes manufacturer parts associated with the component. |

|
Set as permanent component:
Generally, when all the graphical elements (symbol, 2D footprint)
are deleted, the component is removed. You can activate a special
property on the component to keep it. |

|
Delete: Deletes
the selected component. To delete a component, all symbols representing
this component must be deleted. |

|
Delete 3D model:
Removes the 3D assembly from the graphical area and uncheck the
checkbox on the dockable panel, indicating that it is not inserted. |