SOLIDWORKS Electrical Schematic
- Exercise #10
This exercise allows you to create a cabinet layout. It is based on
the electrical project you made in the Exercise
#09. If you did not complete it, you can download the electrical
project file and unarchive
it in SOLIDWORKS Electrical.
If this is your first time, open the PDF file of the exercise to read
through it. Printing it out is recommended.
Generating
cabinet layout drawings
Generate the L1 cabinet layout
drawing. This drawing will be created in the Cabinet
layout folder.
1. Select the 2D
cabinet layout command in the Process
menu.

|
Menu: Process > 2D Cabinet
layout |
2. In the Creation
of 2D cabinet layout drawings dialog box, check the box corresponding
to L1 in the list of locations.
3. To select the destination folder, click on the
[...] button and create the Cabinet layout folder.
4. Open the 2D layout drawing corresponding to location
L1.
Execute the drawing list again to include the above drawing in this
list.
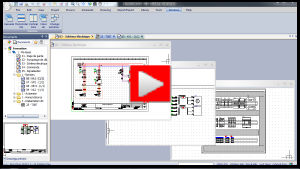
2D Cabinet layout
If the 2D cabinet layout drawing is not open, open it and insert the
cabinet, ducts, rails, and components so that it complies with the Appendix #10A.
1. The first step is to insert the cabinet to define
the scale. In the contextual menu of the 09113
reference select the command Insert as
cabinet.

|
Contextual menu of a reference: Insert
as cabinet |
2. Insert the block inside the drawing and use the
best scale factor, manually entering (1:3).
3. Insert the ducts using the same process (Insert as duct). In the graphical
zone, click a second point to define the duct length or enter a value
in the dockable panel.
Note: You can use the Orientation options
to turn the block. You can activate or deactivate the drawing
locks to help you to adjust the ducts. |
4. To insert the rails, double-click on the 009213 reference. In the dialog
box, select the option Insert as a rail.
The placement is similar to the ducts.
5. To add the missing rail, use the Add
rail command.

|
Menu: Cabinet layout >
Add rail |
6. Insert the F1
component using the command Insert
in the contextual menu of the manufacturer part assigned to F1.
7. Select the F2,
F3 and F4
components. In the same way, insert them. Note that a dialog box opens
allowing you to change the insertion order.
8. Insert the 2D footprints corresponding to all the
other components, except the PLC N1.
9. To insert a terminal strip, select it and in its
contextual menu select the option Insert
terminal strip. Place the first terminal and keep the options by
default. All the other terminals are automatically inserted.
10. The 2D footprint associated with N1
is not available and if you want to insert it SOLIDWORKS Electrical
uses the generic 2D footprint. Edit the manufacturer part assigned to
N1 and attach the AL2-10MR
2D footprint or download it from the eCP.