DimXpert Value PropertyManager
In the DimXpert Value
PropertyManager, you specify the display of dimensions and tolerances.
To set the default tolerance and precision values, click Options
 , Document Properties,
DimXpert.
Reference Features
|

|
|
Tolerance Feature  . The top plane P2. . The top plane P2.
 For size dimensions, only Tolerance
Feature For size dimensions, only Tolerance
Feature  appears in the PropertyManager. appears in the PropertyManager.
|
|
|
|
|
|
Origin Feature  . The bottom plane P1. . The bottom plane P1. |
|
|
|
|
|
 See ASME Y14.5M -1994, Paragraph 2.6.1 or
ISO 129 for information regarding origin and toleranced features. See ASME Y14.5M -1994, Paragraph 2.6.1 or
ISO 129 for information regarding origin and toleranced features.
|
|
|
|
|
|
Swap Features  |
|
|
|
|
Examples Using Different Origin Features |
|
|
Origin Feature  = the bottom plane P1. = the bottom plane P1. |
Origin Feature  = the top plane P2. = the top plane P2. |
|
The origin symbol, in place of the arrowhead,
denotes the origin feature. |

|

|
|
|
|
|
|
Note the different dimension results. |

|

|
DimXpert Direction
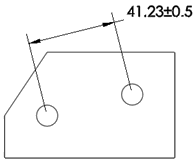
This option appears when you apply a dimension between two axis- or
line-type features. The X, Y,
and Z
options are relative to the part coordinate system and are enabled for
each part axis that is perpendicular to the axes of the features.
|
The axis of the features is along Z,
which enables the X and Y
options. |

|
|
|
|
|
The normal option N
orients the dimension along the direction defined by the shortest distance
between the two features. |

|
|
|
|
|
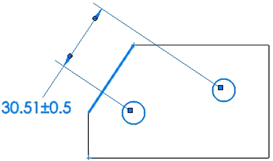
The user-defined option U orients
the dimension along a direction parallel to an edge or normal to a planar
face.
In this example, the dimension is oriented parallel to an edge. |

|
Tolerance/Precision
Callout value. For hole type
callouts with multiple specifications, all dimensions are listed individually.
This functionality is valid for simple holes with depth, counterbore holes,
countersink holes, combined slot dimensions, and chamfers.
Tolerance Type  . Select from the list. Selections available depend on the
type of dimension.
Maximum Variation  .
.
Minimum Variation  .
.
Show parentheses. Inserts parentheses
around the tolerance value.
Unit Precision  . Select the number of digits after the decimal point from
the list for the dimension value.
Tolerance Precision  . Select the number of digits after the decimal point for
tolerance values.
For Holes and Shafts
Classification
 . (Fit, Fit with tolerance, or Fit
(tolerance only)) When you select either Hole
Fit or Shaft Fit (below),
the list for the other category (Hole
Fit or Shaft Fit) is filtered
based on the classification.
Hole Fit
 and Shaft Fit
 . (Fit, Fit with tolerance, or Fit
(tolerance only)) Select from the lists, or type any text.
NOTE:
Bilateral tolerances (Maximum Variation
and Minimum Variation) are available
in the Fit with tolerance or Fit (tolerance only) type if you specify
Hole Fit or
Shaft Fit, but not both.
Fit tolerance
display. (Fit,
Fit with tolerance,
or Fit (tolerance only))
 Stacked
with line display.
 Stacked
without line display.
 Linear
display.
Primary Value
This option is read-only. It displays the dimension name and value.
Dimension Text
Instance
Count. For patterns, this shows the number of instances.
Text Controls:
Text. The dimension appears
automatically in the center text box, represented by <DIM>.
Place the pointer anywhere in the text box to insert text.
 Holes use the format specified
in the txcalloutformat.txt file.
See DimXpert
Size Dimension, Callout format
file, for more information.
Justify. You can justify text
horizontally and, for some standards, you can justify the leader vertically.
Symbols. Click to place the
pointer where you want a symbol. Click a symbol icon or click More
to access the .
 Use caution when adding symbols
to DimXpert dimensions because the symbols may change the fundamental
definition of the dimensions and tolerances.
|
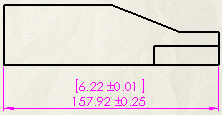
Dual dimension.
Specifies that the dimension is displayed in both the document's unit
system and the dual dimension units. Both units are specified in Tools, Options,
Document Properties, Units. |

|
|
Unit Precision  . Select the number of digits after the decimal point from
the list for the dimension value. . Select the number of digits after the decimal point from
the list for the dimension value.
Tolerance Precision  . Select the number of digits after the decimal point for
tolerance values. . Select the number of digits after the decimal point for
tolerance values. |