You can specify document-level drafting settings for all dimensions. Available for all document types.
Dimensions that are inserted using Insert Model Items, DimXpert, and other automated methods are placed on predefined locations that radiate out from the drawing view. You set the predefined locations in this dialog box.
To display this dialog box, in a drawing, click
Options  (Standard toolbar), select Document Properties, and then select Dimensions.
Overall drafting standard
| Overall drafting standard
|
Inherited from the selected Drafting Standard page settings. |
Text
| Font
|
Click to modify the font.
|
Each time you change the dimension font, the document-level font for each dimension type is updated accordingly.
Dual dimensions
| Dual dimensions display
|
Select to display dimensions in dual units. |
| Show units for dual display |
Select to display units for the second set of dimensions. |
| Dimension value position |
Top |
| Bottom |
| Right |
| Left |
Primary precision
 |
Unit Precision
|
Select the number of digits included after the decimal point for the value. |
 |
Tolerance Precision |
Select the number of digits included after the decimal point for the tolerance.
|
| |
Link precisions with model |
For imported dimensions, sets changes in unit or tolerance precision to be parametric with the model. |
Dual precision
 |
Unit Precision |
Select the number of digits after the decimal point from the list
for the value in the secondary units. |
 |
Tolerance Precision |
Select the number of digits after the decimal point for the tolerance
values for the secondary units.
|
| |
Link precisions with model |
For imported dimensions, sets changes in unit or tolerance precision for the secondary units to be parametric with the model. |
Stacked Fractional Dimension Size by Percentage
Bent leaders
| Leader length |
Enter the length of the unbent portion of the leader. |
| Extend to text |
Leader shoulders extend to meet the end of the line of dimension text. |
Arrows
| Size
|
Specify the three arrow size fields.
|
| Select Scale with dimension height to re-scale the arrow size according to the height of the dimension extension line. |
| Style |
Select a style from the list, and click a dimension style type button:
|
Offset distances
| Offset distances |
Sets the dimension distances from the model and from each successive location (as indicated by the red dimensions below). Offset distances must conform to the values assigned in Offset distances. The default offset distances are .40 inches (10.16 mm) from the model edge and .25 (6.35 mm) inches between dimensions.
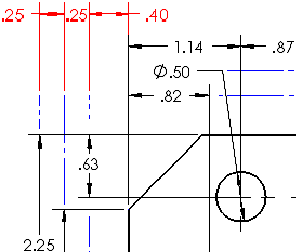
|
| Gaps |
For baseline dimensions, specify the offset distances:
- Between the model and the first dimension
extension line
- Between dimension extension lines
These values also control the spacing between dimensions that are offset from one another and from the model edge when using rapid dimensioning. |
| Annotation view layout
|
Select to use offset distances specifications from an annotation view. (See Annotation View PropertyManager.) Clear to enter the gaps.
|
Break dimension extension/leader lines
| Gap
|
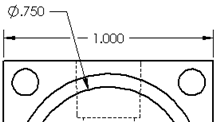
Specify the gap in broken extension and leader lines.
|
 |
| Break only around dimension arrows |
Select to display breaks only when the lines and arrows intersect.
|
To break the dimension lines, select the dimension and click Break Lines in the PropertyManager. When you break dimension lines, they break around nearby lines. If you move a dimension significantly, it might not break around nearby lines. To update the display, clear Break Lines for the selected dimension and click Break Lines again.
Extension lines
| Gap
|
Specify the distance between the model and the dimension
extension lines. This value also controls the gap between extension lines and
center marks.
|
| Beyond dimension line |
Specify the length that the extension line extends beyond the
dimension line.
|
| |
 |
Options
| Leading zeros |
| Standard |
Leading zeros appear according to the overall drafting standard. |
| Show |
Zeros before decimal points are shown. |
| Remove |
Leading zeros do not appear.
|
|
| Trailing Zeros |
| Smart |
Trailing zeros are trimmed for whole metric values, conforming to ANSI and ISO standards. |
| Standard |
Trailing zeros appear according to the ASME Y14.5M-1994 standard. |
| Show |
Trailing zeros are displayed according to the decimal places you specify for Units. |
| Remove |
Trailing zeros do not appear.
|
|
| Show units of dimensions |
Select to show dimension units in drawings.
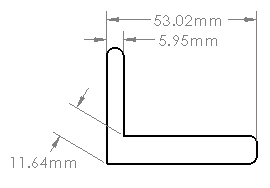
|
| Add parentheses by default
|
Select to display dimensions within parentheses.
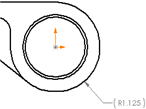
To set the color, click . In Color scheme settings, select Dimensions, Non Imported (Driven).
|
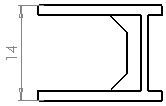
| Center between extension lines |
Select to center dimensions between extension lines. This option also selects Center Dimension  in PropertyManagers that contain the Center Dimension option. in PropertyManagers that contain the Center Dimension option.
When you drag dimension text between the extension lines, the dimension text snaps between the center of the extension lines.
|
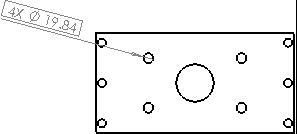
| Include prefix inside basic tolerance box
|
Select to include a text prefix inside tolerance boxes when you specify a prefix.
|
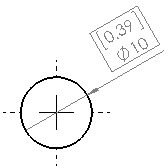
| Display dual basic dimension in one box |
Select to include dual dimensions in one basic tolerance box.
|
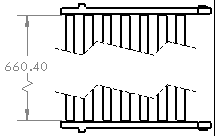
| Show dimensions as broken in broken views |
Select to break dimension lines for broken views.
|
| Apply updated rules |
Select to update vertical alignment of bent leaders so that shoulders center on appropriate line of dimension text in geometric dimensioning and tolerancing feature control frame. Existing dimensions display unchanged until this option is applied. Once applied, the option is no longer available.
 |
| Previous rules |
 |
| Updated rules |
|
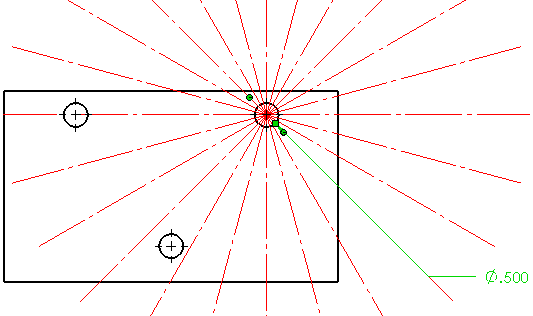
| Radial/Diameter leader snap angle |
Modify the snap angle intervals used when you drag diameter, radial, or
chamfer dimensions along radial locations.
|
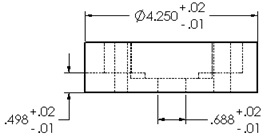
| Tolerance |
Click to set the tolerance.
|