Set the Sweep PropertyManager options based on the type of sweep feature.
To open this PropertyManager:
Sketch a profile and a path to follow, then click Swept Boss/Base  (Features toolbar),
Swept Cut
  (Features toolbar), or
Swept Surface
  (Surfaces toolbar).
Profile and Path
| |
Profile sweep |
Creates a sweep using a profile and path. |
| |
Solid sweep |
(Available for cut sweeps only. Not available for assembly features.) Creates a cut-sweep using a tool body and path. The most common usage is in creating cuts around cylindrical bodies. This option would also be useful for end mill simulation. For cut sweeps only, when you select Solid sweep, the path must be tangent within itself (no sharp corners) and begin at a point on or within the tool body profile.
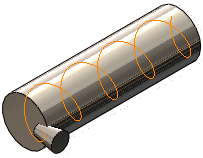 |
| Tool body and path |
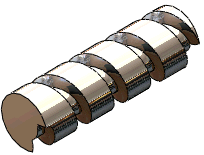 |
| Cut sweep |
Note how Solid sweep handles a tool body following a helix path:
When you select Follow path for the Orientation/twist type, and None for Path alignment type, the tool body correctly follows the tangents of the helix path.

To keep the tool body perpendicular to a reference as it follows a helix path, select Direction Vector for Path alignment type, then select a direction to which the tool body remains perpendicular, for example, the normal to the planar end face of a cylinder.
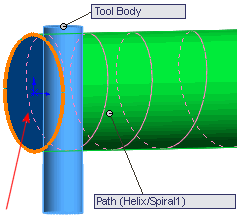
The tool body remains parallel to the end face as it follows the helix path along the cylinder. This functionality is important for the tool machining market.

|
 |
Profile |
Sets the sketch profile (section) used to create the sweep. Select the profile sketch in the graphics area or FeatureManager design tree. The profile must be closed for a base or boss sweep feature. The profile may be open or closed for a surface sweep feature.
|
 |
Tool body (solid cut sweeps only) |
The tool body must be convex, not merged with the main body, and consist of one of the following:
- A revolved feature that consists of analytical geometry only, such as lines and arcs.
- A cylindrical extruded feature.
|
 |
Path |
Sets the path along which the profile sweeps. Select the path sketch in the graphics area or FeatureManager design tree. The path can be open or closed, and can be a set of sketched curves contained in one sketch, a curve, or a set of model edges. The start point of the path must lie on the plane of the profile.
|
| |
|
Neither the section, the path, nor the resulting solid can be self-intersecting.
|
Options
| |
Orientation/twist type |
Controls the orientation of the Profile  as it sweeps along the Path as it sweeps along the Path  . Options are: . Options are:
|
| |
|
|
Follow Path
|
Section remains at same angle with respect to path at all times. When you select Follow Path, options stabilize the profiles when small and uneven curvature fluctuations along the path cause the profiles to misalign.
|
|
Keep normal constant
|
Section remains parallel to the beginning section at all times.
|
|
Follow path and 1st guide curve
|
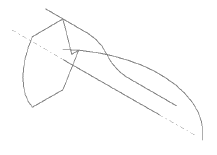
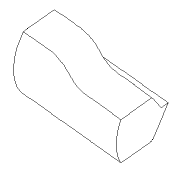
Select Follow path and 1st guide curve and the twist of the intermediate sections is determined by the vector from the path to the first guide curve. The angle between the horizontal plane and the vector remains constant in the sketch planes of all of the intermediate sections.
|
|
Follow 1st and 2nd guide curves
|
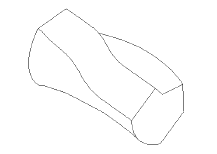
Select Follow 1st and 2nd guide curves and the twist of the intermediate section is determined by the vector from the first to the second guide curve. The angle between the horizontal plane and the vector remains constant in the sketch planes of all of the intermediate sections.
|
|
Twist Along Path
|
Twists the section along the path. Define the twist by degrees, radians, or turns under Define by.

This example shows one turn.
|
|
Twist Along Path With Normal Constant
|
Twists the section along the path, keeping the section parallel to the beginning section as it twists along the path.

This example shows one turn.
|
|
| |
Define by (Available with Twist Along Path or Twist Along Path With Normal Constant selected in Orientation/twist type). |
Select one of the following:
|
Twist definition
|
Define the twist. Select Degrees, Radians, or Turns.
|
|
Twist angle
|
Sets the number of degrees, radians, or turns in the twist.
|
|
| |
Path alignment type (Available with Follow Path selected in Orientation/twist type) |
Stabilizes the profile when small and uneven curvature fluctuations along the path cause the profile to misalign. Options are: |
| |
|
|
None
|
Aligns the profile normal to the path. No correction is applied.
|
|
Minimum Twist
|
(For 3D paths only). Prevents the profile from becoming self-intersecting as it follows the path.
|
|
Direction Vector
|
Aligns the profile in the direction selected for Direction Vector. Select entities to set the direction vector.
|
|
All Faces
|
When the path includes adjacent faces, makes the sweep profile tangent to the adjacent face where geometrically possible.
|
|
 |
Direction Vector (Available with Direction Vector selected in Path alignment type) |
Select a plane, planar face, line, edge, cylinder, axis, a pair of vertices on a feature, and so on to set the direction vector.
|
| |
Merge tangent faces |
If the sweep profile has tangent segments, causes the corresponding surfaces in the resulting sweep to be tangent. Faces that can be represented as a plane, cylinder, or cone are maintained. Other adjacent faces are merged, and the profiles are approximated. Sketch arcs may be converted to splines.
|
| |
Show preview |
Displays a shaded preview of the sweep. Clear to display only the profile and path.
|
| |
Merge result |
Merges the solids into one body.
|
| |
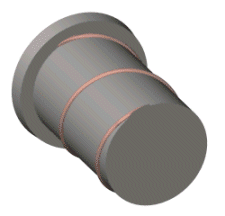
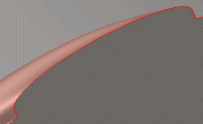
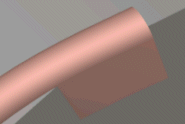
Align with end faces |
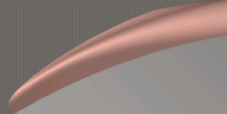
Continues the sweep profile up to the last face encountered by the path. The faces of the sweep are extended or truncated to match the faces at the ends of the sweep without requiring additional geometry. This option is commonly used with helices.
|
| |
|
| Align with end faces selected
|
Align with end faces cleared
|
 |
 |
| Top of helix |
Top of helix |
 |
 |
| Bottom of helix |
Bottom of helix |
|
Start/End Tangency
Start tangency type and End tangency type.
| None |
No tangency is applied.
|
| Path Tangent |
Create the sweep normal to the path at the start. |
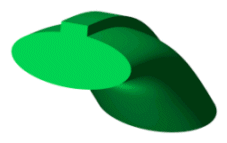
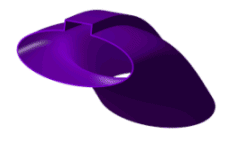
Thin Feature
Select to create a thin feature sweep.
 |
 |
| Sweep with solid feature |
Sweep with thin feature |
| Thin feature type |
Sets the type of thin feature sweep. The options are:
|
One-Direction
|
Creates the thin feature in one direction from the profiles using the Thickness  value. If necessary, click Reverse Direction value. If necessary, click Reverse Direction  . .
|
|
Mid-Plane
|
Creates the thin feature in both directions from the profiles, applying the same Thickness  value in both directions. value in both directions.
|
|
Two-Direction
|
Creates the thin feature in both directions from the profiles. Set individual values for Thickness  and Thickness and Thickness  . .
|
|
Feature Scope
Specifies which bodies or components you want the feature to affect.
- For multibody parts, see Feature Scope in Multibody Parts.
- For assemblies, see Feature Scope in Assemblies.