Drag the parts to create the assembly.
-
Create a new assembly document.
Close the Begin
Assembly PropertyManager if it appears.
-
Open the three parts that you created: the left button plus the
upper and lower housings.
The right button is already open.
-
Click Tile Horizontally
 (Standard toolbar)
or click
so that all five documents are
visible.
(Standard toolbar)
or click
so that all five documents are
visible.
-
In the LeftButton
document, drag the part name, LeftButton,
from the top of the FeatureManager design tree and drop it onto the Assem<n> name at the top of the assembly
document's FeatureManager design tree.
Dragging this way aligns all the documents properly to the
new assembly document origin.
-
Repeat the process for the right button, upper housing, and
lower housing parts.
-
With the assembly file active, click .
-
In the dialog box, save the part to the Base folder as AssemblyBase.SLDASM.
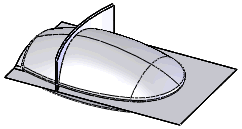
The assembly
displays all the surface part line quilts. To hide the quilts, in the
assembly's FeatureManager design tree, hide all the bodies in the Surface Bodies folder for all four
components.