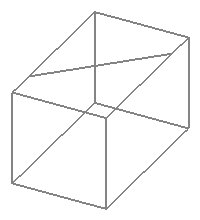
You use 2D and 3D sketches to define the basic framework of a weldment
part. Then you add structural members along the sketch segments. To start this lesson, open
the part document
weldment_box.SLDPRT,
which already contains some 2D and 3D sketches.
-
Download and extract the sample files for this tutorial:
-
Click here to download weldments.zip to your Downloads folder.
For more information on downloading and managing
sample files, see
Sample Files.
-
Browse to the Downloads folder and extract weldments.zip to a convenient location.
For example, to organize your tutorial sample
files, create a folder in your Documents folder named tutorial_files. Then extract into that folder to create
a subfolder named weldments that
contains the sample files for this tutorial.
-
In the weldments
folder, open weldment_box.SLDPRT.
-
Click and save the file as
My_weldment_box.SLDPRT.

In the FeatureManager design tree, click
Sketch1, then 3DSketch1, then Sketch2. When you click each item, the corresponding sketch
segments are highlighted in the graphics area.
-
Do one of the following:
- To display the Weldments toolbar, click .
- To add the Weldments
tab
to the CommandManager, right-click a tab in the CommandManager and
under
Tabs, select Weldments from the list.