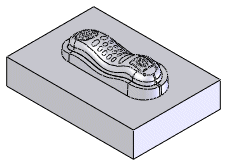
You now have a multibody part file, which maintains your design intent in one convenient location. Changes to the telephone handset model are automatically reflected in the tooling bodies.
Now create an assembly where you can add other supporting hardware, create assembly features, and so on.
First, rename the tooling bodies for easier identification.
Next, save the bodies in separate part documents.
-
In the FeatureManager design tree, in Solid Bodies
 , click-pause-click Tooling Split1[1].
The body name is highlighted and ready to rename.
-
Type Core and press
Enter.
-
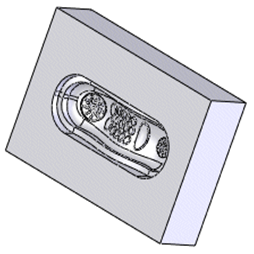
Repeat steps 1 and 2 for Body-Move/Copy1, and name it Cavity.
-
In the FeatureManager design tree, in Solid Bodies
, right-click Core and select Insert into New Part.
-
In the PropertyManager, next to Title, click
Browse (…).
-
In the dialog box, in File name, enter
MyTelephone-Core, then click
Save.
The path to the new part appears under
Title.
-
Click
 .
.
If a dialog appears asking if you want to change the unit
of measure in the derived part, click Yes.
-
Click Window and select
MyTelephone.SLDPRT to return to the
telephone handset part.
-
In the FeatureManager design tree, in Solid Bodies
, right-click Cavity and select Insert into New
Part.
-
In the PropertyManager, next to Title, click
Browse (…).
-
In the dialog box, in File name, enter
MyTelephone-Cavity, then click
Save.
The path to the new part appears under
Title.
-
Click .
If a dialog appears asking if you want to change the unit
of measure in the derived part, click Yes.
-
Click .
Click Save All if the software prompts
you to save component documents.