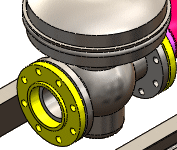
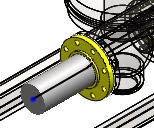
Start the first route by dragging a flange into the assembly.
You can use tools on the View toolbar to zoom, rotate, and pan the model view to facilitate working with the model.
-
Click Start by Drag/Drop
 (Piping toolbar).
-
In the Design Library, navigate to routing\piping\flanges.
-
Drag slip on weld
flange.SLDPRT
from the library to the flange face on the regulator.
-
Drop the flange when it snaps into place.
- Optional:
If the flange is not visible and a message alerts you that slip on
weld flange.SLDPRT is already open, do the following:
-
In the dialog box, click Yes.
The Select a Configuration dialog box
appears.
-
In the dialog box, select Slip On Flange
150-NPS4.
-
Click OK.

The Route
Properties PropertyManager appears.
In the Route
Properties PropertyManager, you specify the properties of the route you
are about to create. Some of the items you can specify include:
- Which pipe or tube parts to use
- Whether to use elbows or bends
For this tutorial, use the default settings.
-
Click
 .
.
The following happens:
- A 3D sketch opens in a new route subassembly.
- The new route subassembly is created in the
FeatureManager design tree as [Pipe_1-MySkid].
If you have cleared the Routing option,
Save route assembly externally, the
new subassembly is saved as a virtual component. To view Routing
options, click
Options

and select
Routing.
- A stub of pipe appears, extending from the flange you
just placed.
